
Building Open Banking Plaid app with Next.js and Express.js.
A full guide for full-stack developers


In this post, you will learn how to develop a simple open banking app using Plaid API, Node.js and Next.js. We will take a look at the important terms, app design and code itself. Feel encouraged to send feedback and suggestions.
This post will be good for people who already have some experience with JavaScript, Express.js and React. However, while writing this article I was also thinking about curious newbies who like connecting dots and doing research using linked materials or by themselves.
Take a look at my other alter-ego FinTech and free thoughts blogs on Substack and follow my Twitter account. Feel free to contact me through my email address as well.
Before we move on, let's take a look at the order of the content in the post. I will start with a brief introduction to Open Banking and Plaid. Then I will present to you the app we will build here and what the goal is. The next steps will be about used technologies, project structure, Plaid API and app design itself. I will also go deeper with some topics when it comes to code.
Table of contents
- Open Banking
- Plaid and competitors of Plaid
- What the app will be about
- Final picture
- Technologies used in the project; little introduction to Node.js, Express.js, API, React and Next.js, Bulma.io, Sass
- Plaid API overview
- Plaid login
- API strategy, double-backend/proxy API, HttpOnly cookie, chart of the calls
- List of required data, the overview of API endpoints
- Backend folder structure
- Error handling in the backend (sematext.com/blog/node-js-error-handling medium.com/codechef-vit/a-better-project-st.. )
- Backend middleware and bearer token extractor
- Backend code
- Back to frontend
- Frontend folder structure
- Frontend auth strategy, AuthContext and RouteProtection
- Next.js server-side API strategy
- Frontend client-side API strategy, SWR
- Error handling in Next.js app
- Nested chain key
- Frontend code
- Summary
1. Open Banking
Open Banking is a technology enabling third parties to use the banks' API in order to obtain public and private data as well as initiate user actions (specifically payments). There are some companies that offer normalized API which helps to make interaction with many banks' data simpler.
In other words, before OpenBanking API if you wanted to build an app that interacts with users' bank account data, you would have to create a web scraper. Now you can build more secure and robust apps of this kind faster.
I encourage you to read more about OpenBanking on my blog A brief introduction to Open Banking, Features of Open Banking API services, How we use Open Banking
2. Plaid and competitors of Plaid
Plaid is one of the most popular OpenBanking API platforms. They provide developers with normalized API data from the UK, US, Canadian, Irish, Dutch and Spanish banks. They are adding new countries, such as Germany or other EU countries, to their list. Maybe while you are reading this post, they support more locations. You can find their list here.
I chose Plaid because of developer-friendly docs and free sandbox. There are other companies which provide the same services. The examples are ndgit, Oracle, Tink, TrueLayer. For a longer list of OpenBanking providers check my post The list of Open Banking API providers
3. What the app will be about
In this post, we will build an app integrated with Plaid API. We will authorize the sandbox user through Plaid Login, receive the information about the bank to which the user is logged in, the list of the accounts as well as information, balances and transactions of the user accounts.
It will be a simple web app, not a full OpenBanking solution. UI/UX will also not be the focus here. But it is a great starting point for learning and building something more complex.
I can imagine a full bank data aggregator app built on the top of the app we will build in this post.
4. Final picture
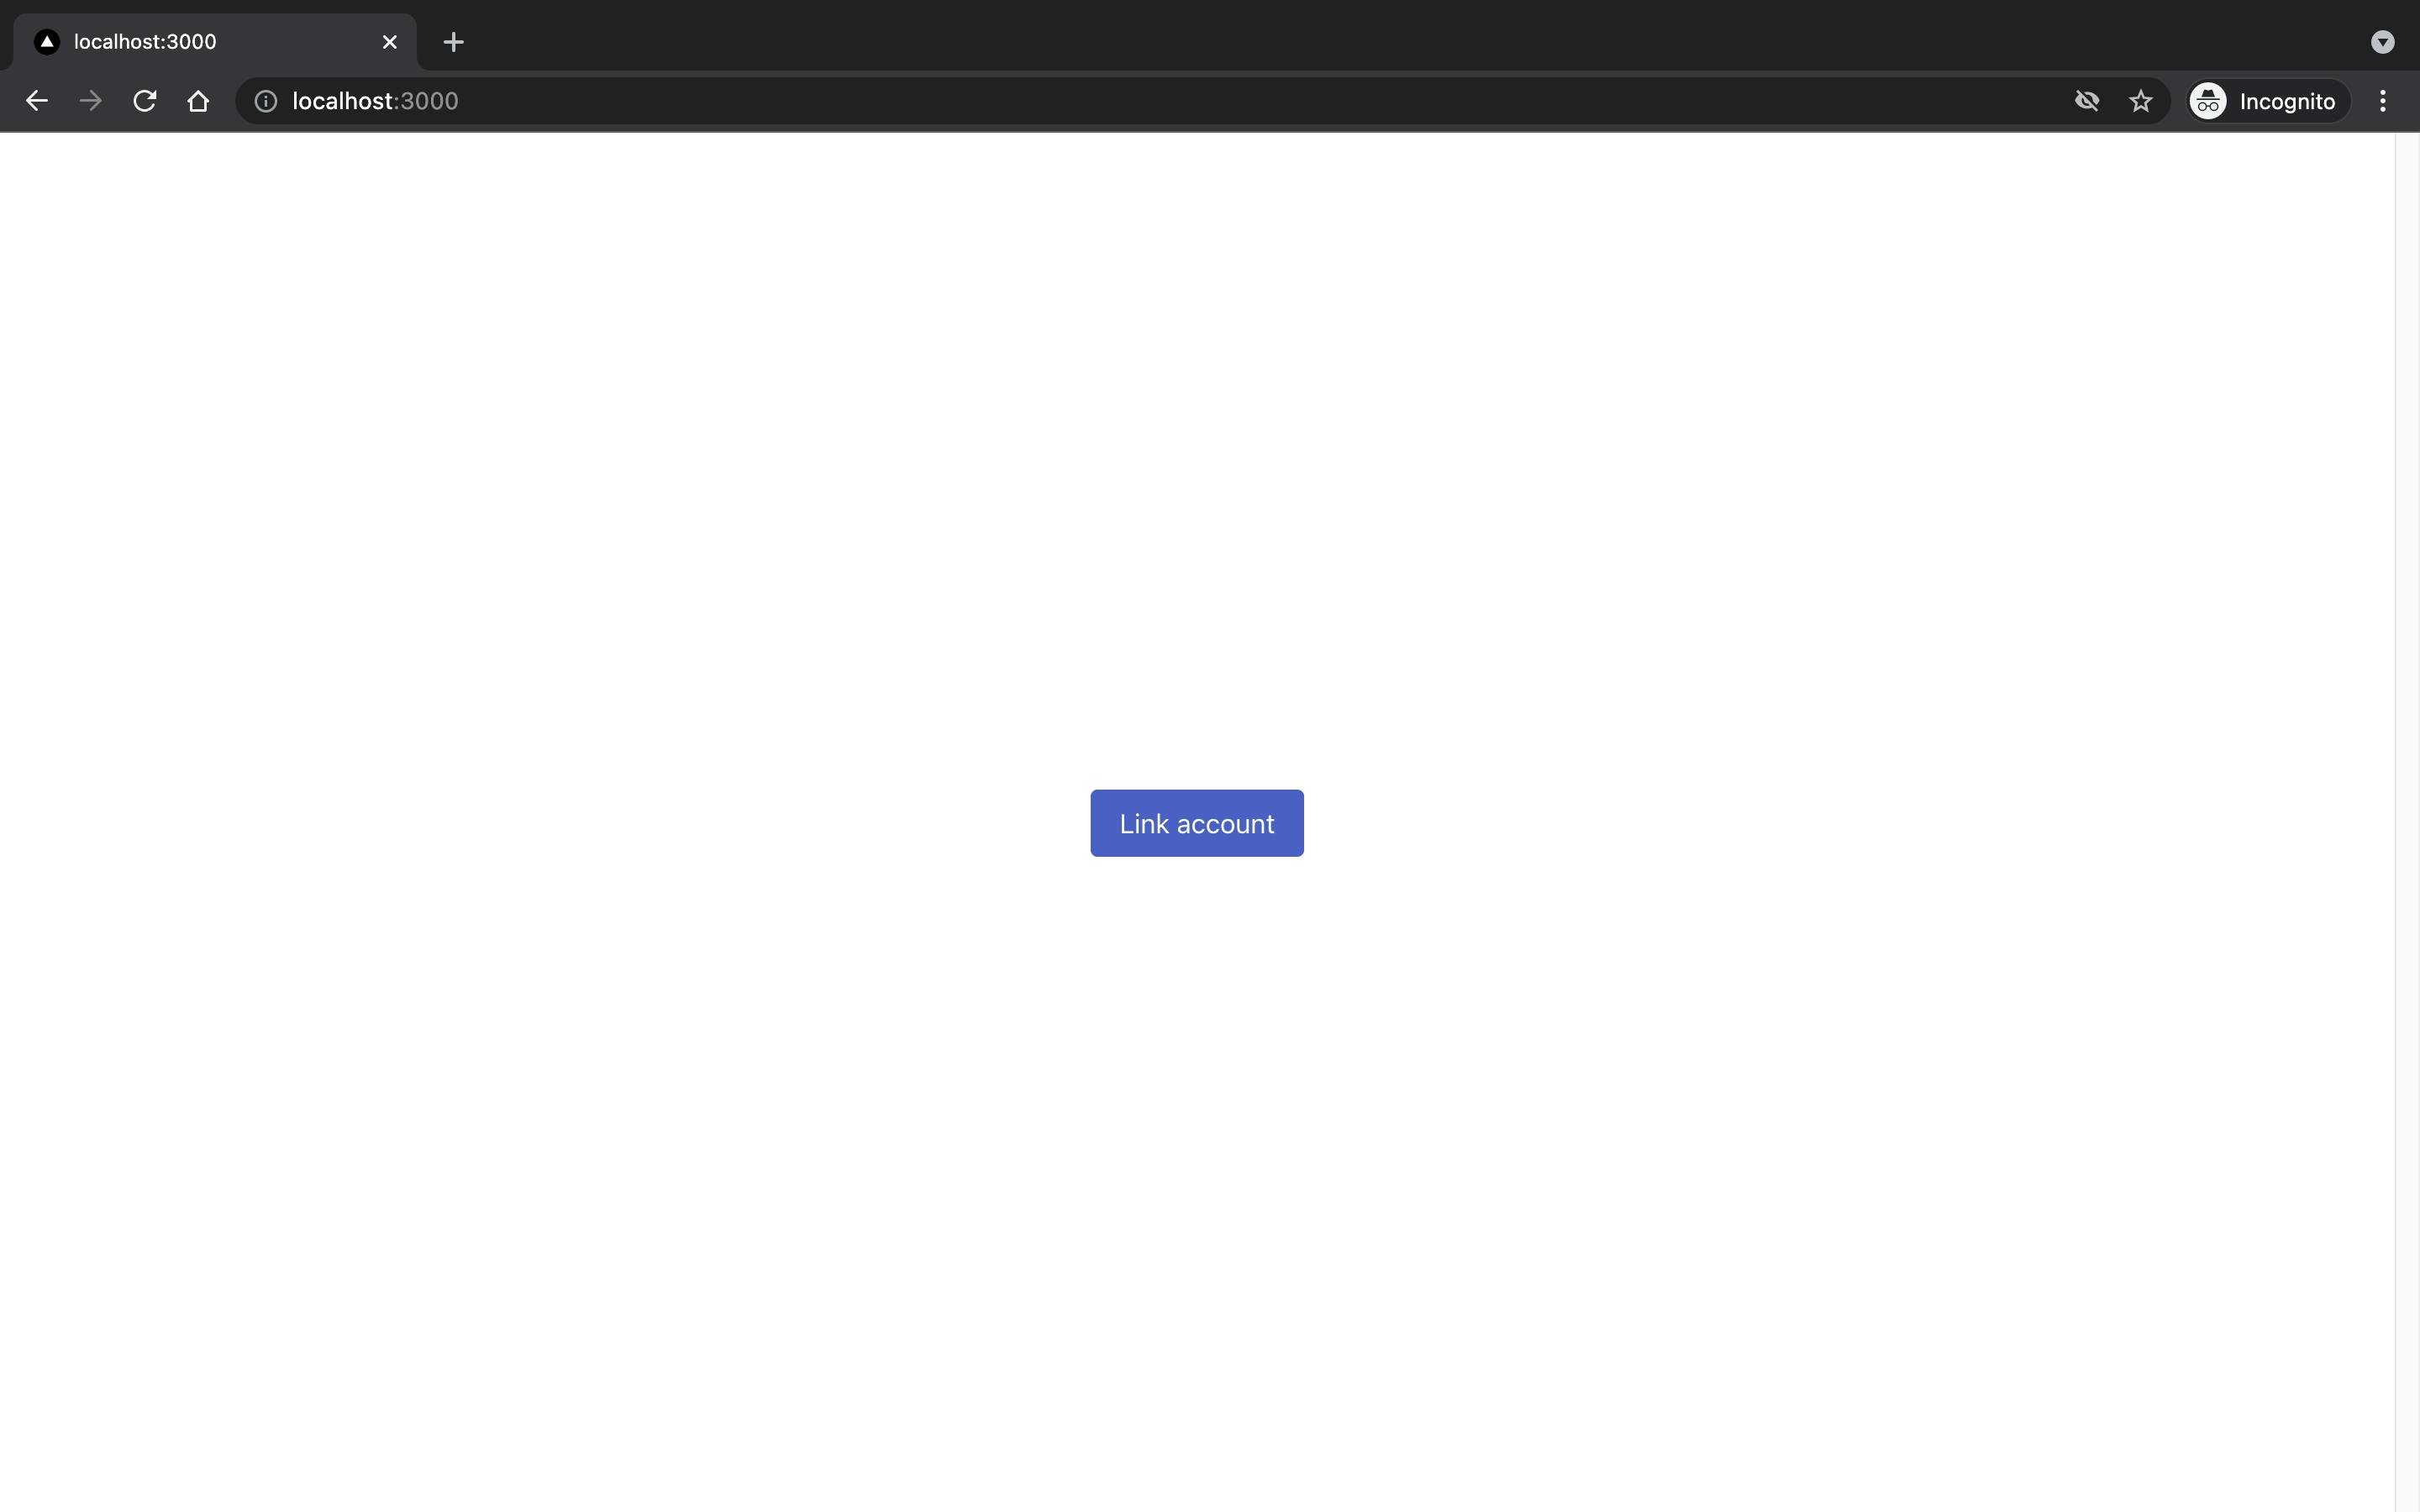 Login page
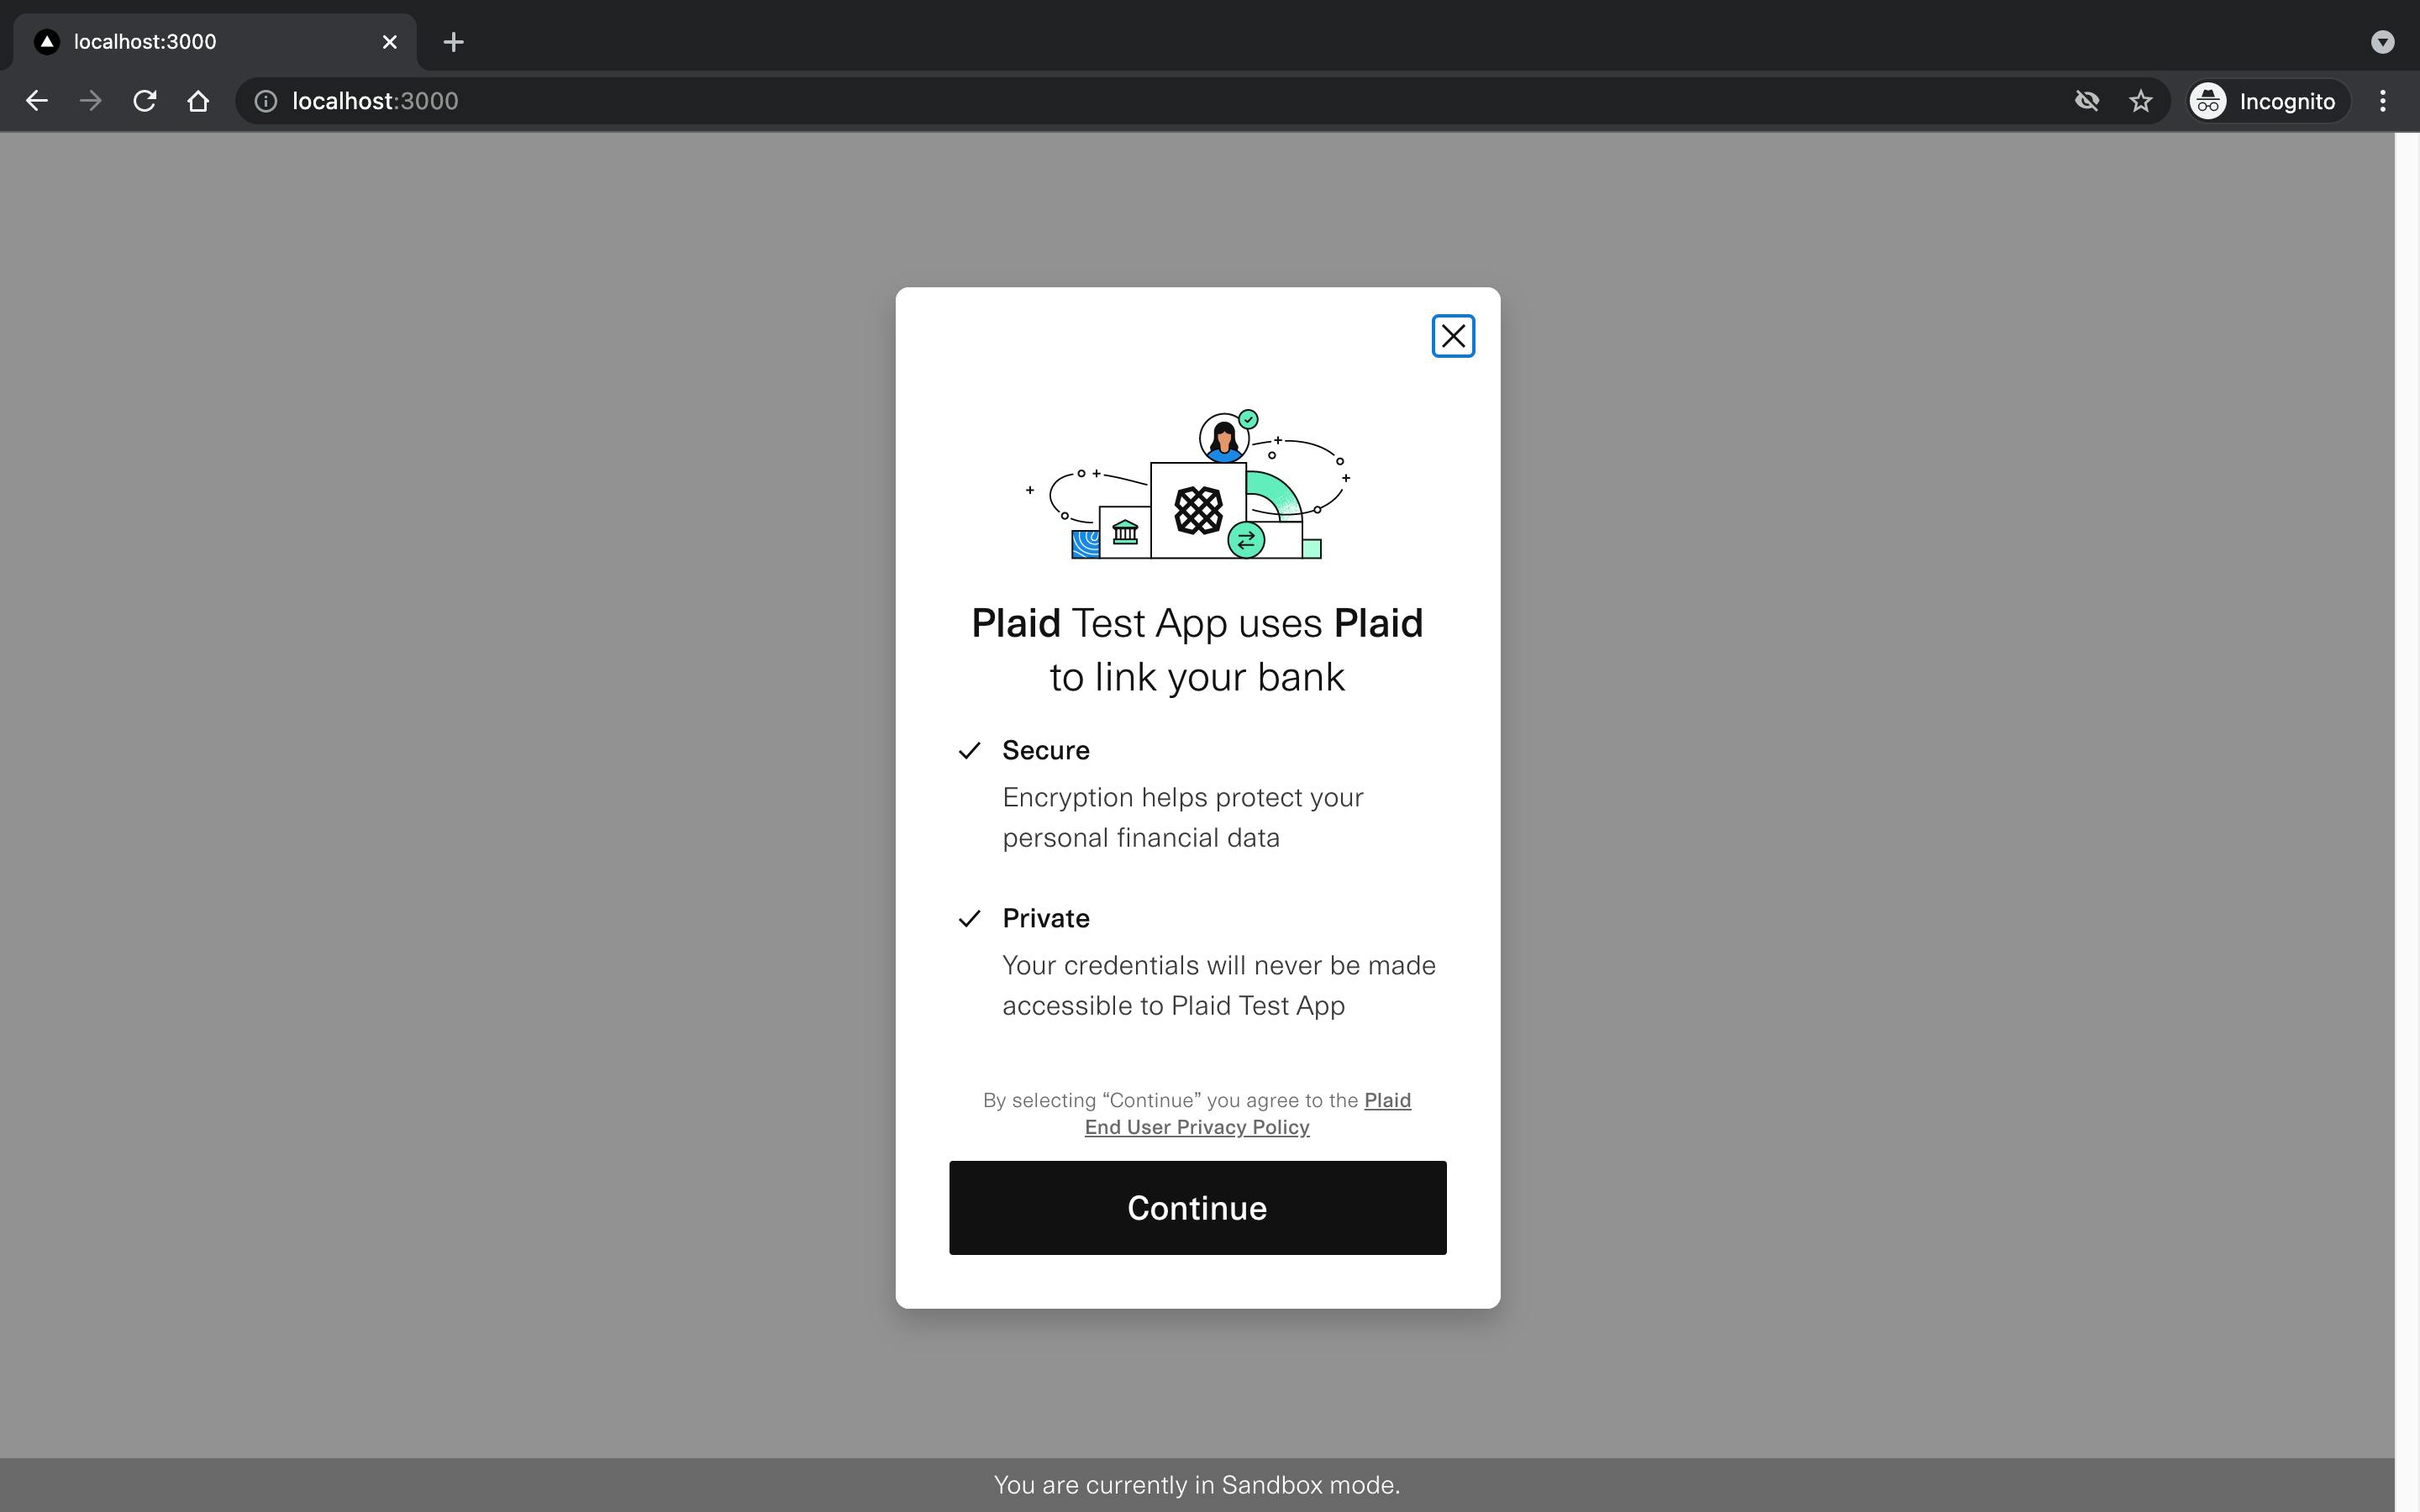 Plaid generated login step 1
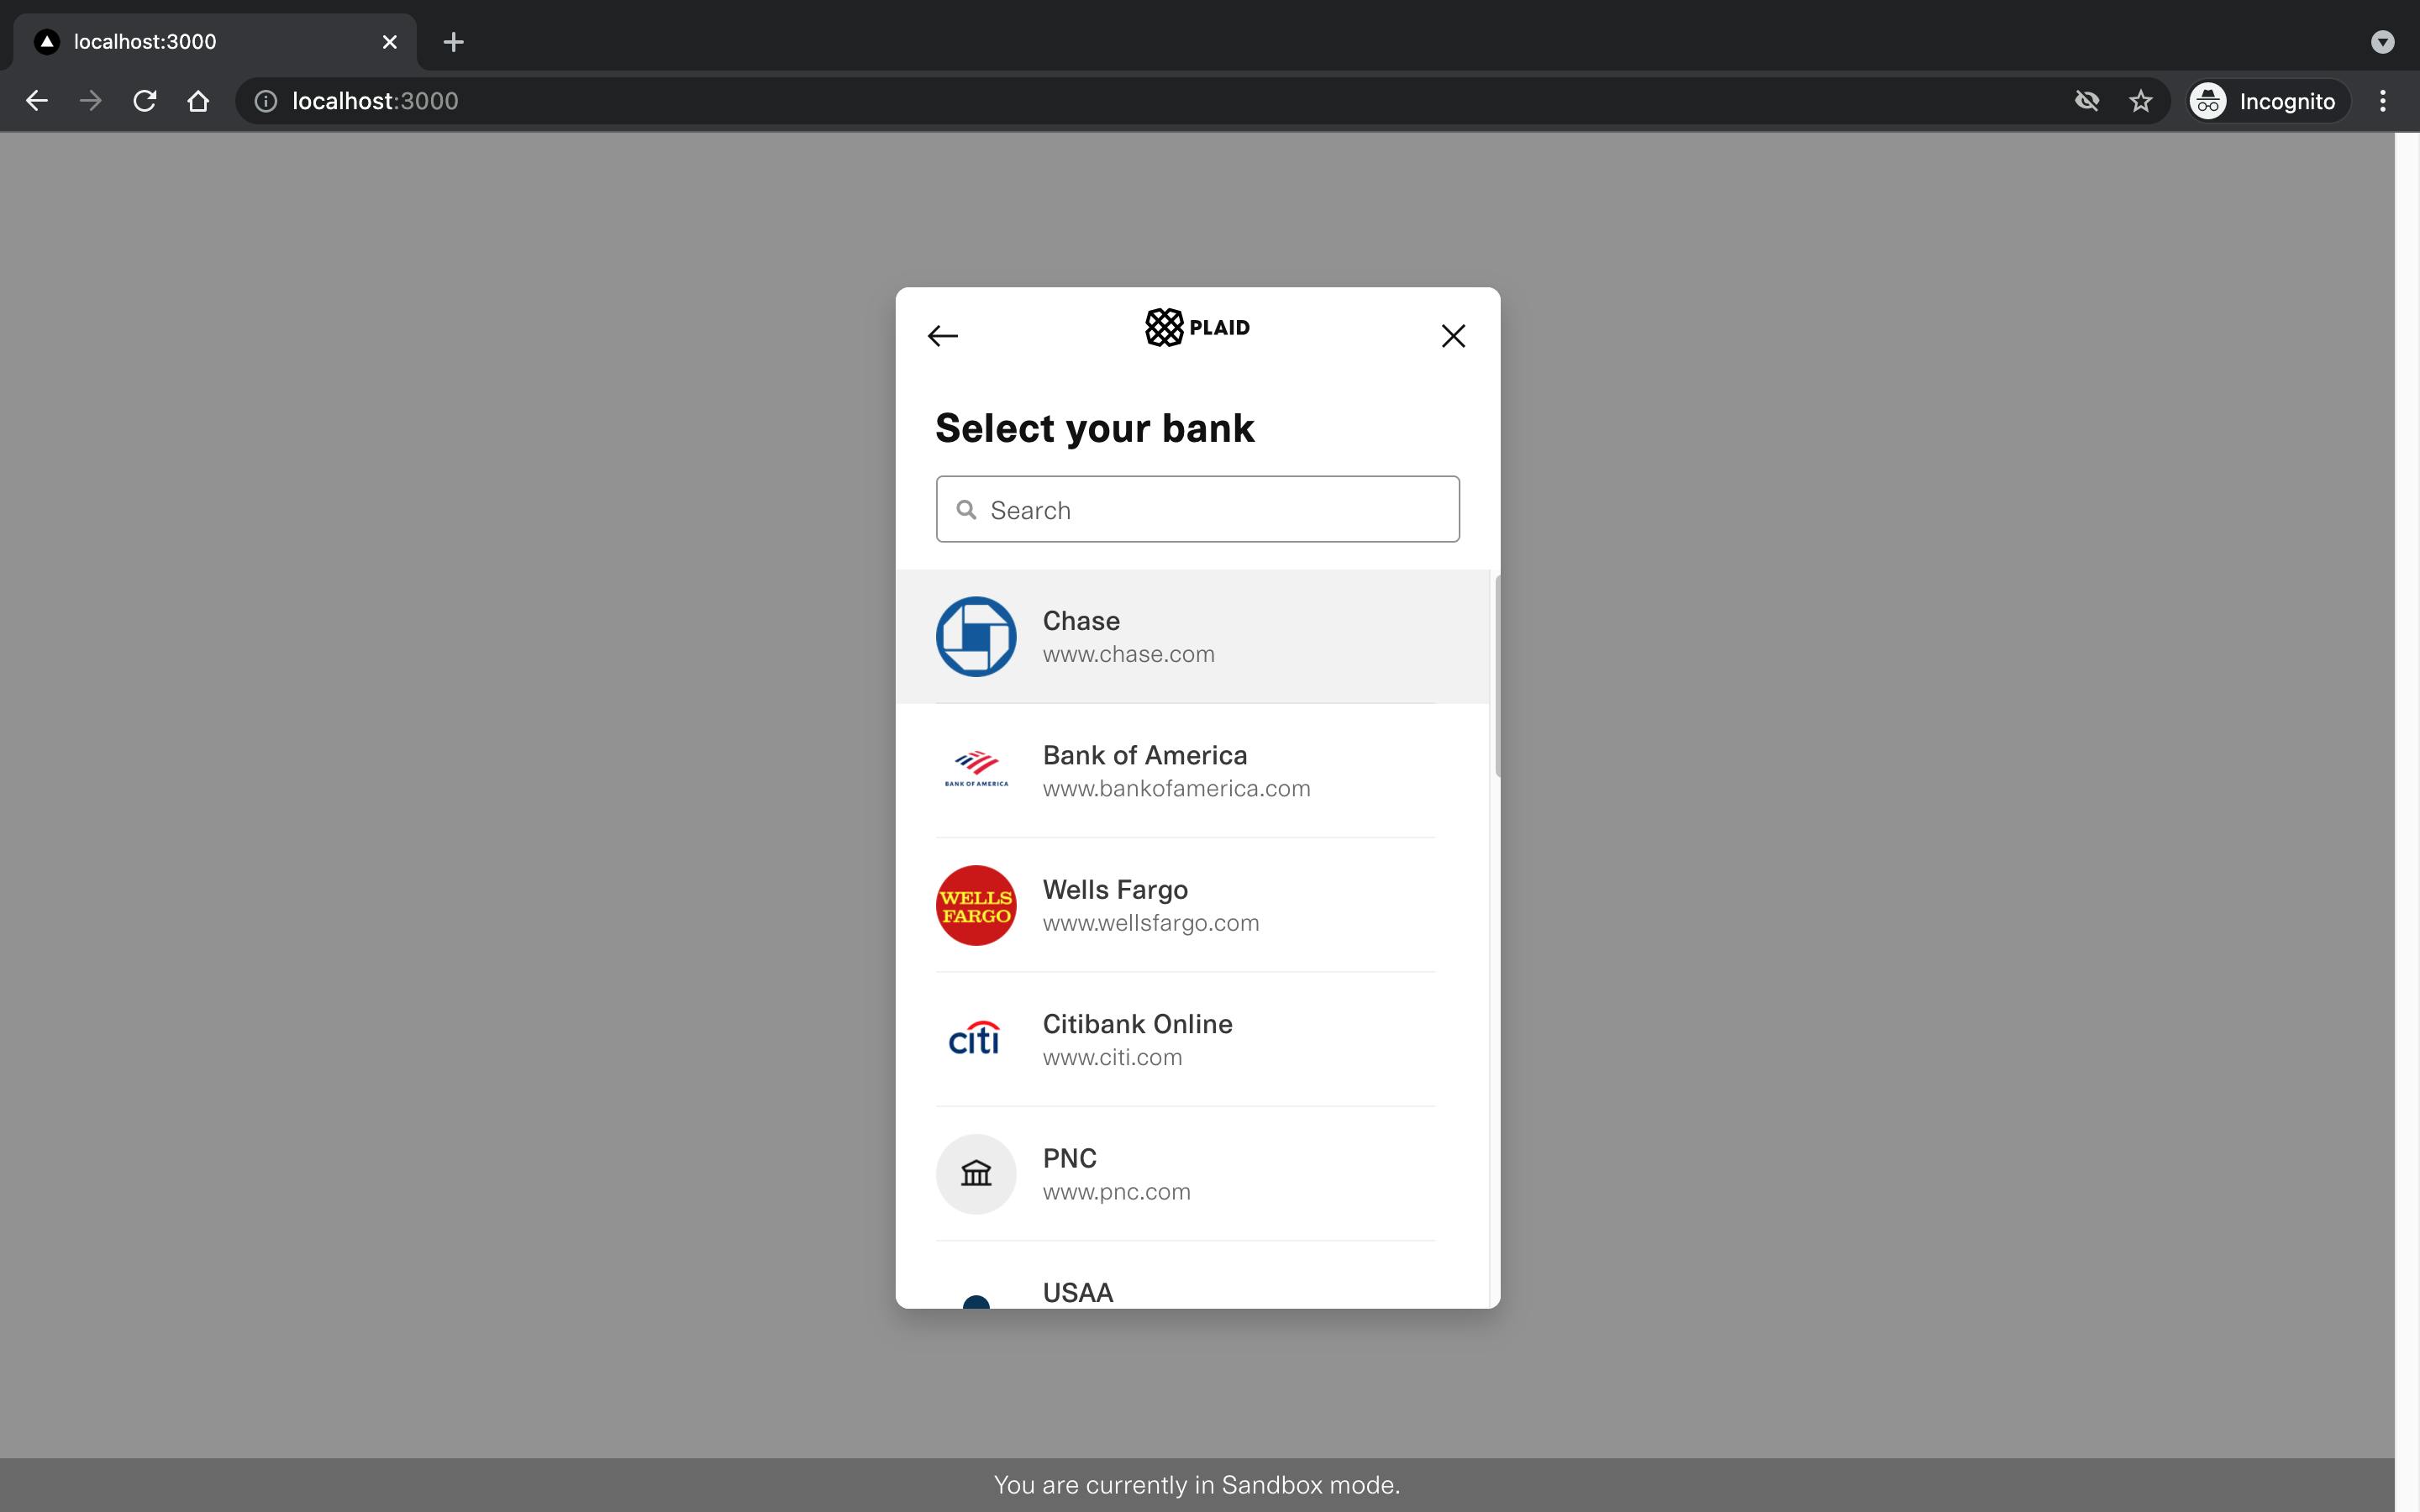 Plaid generated login step 2
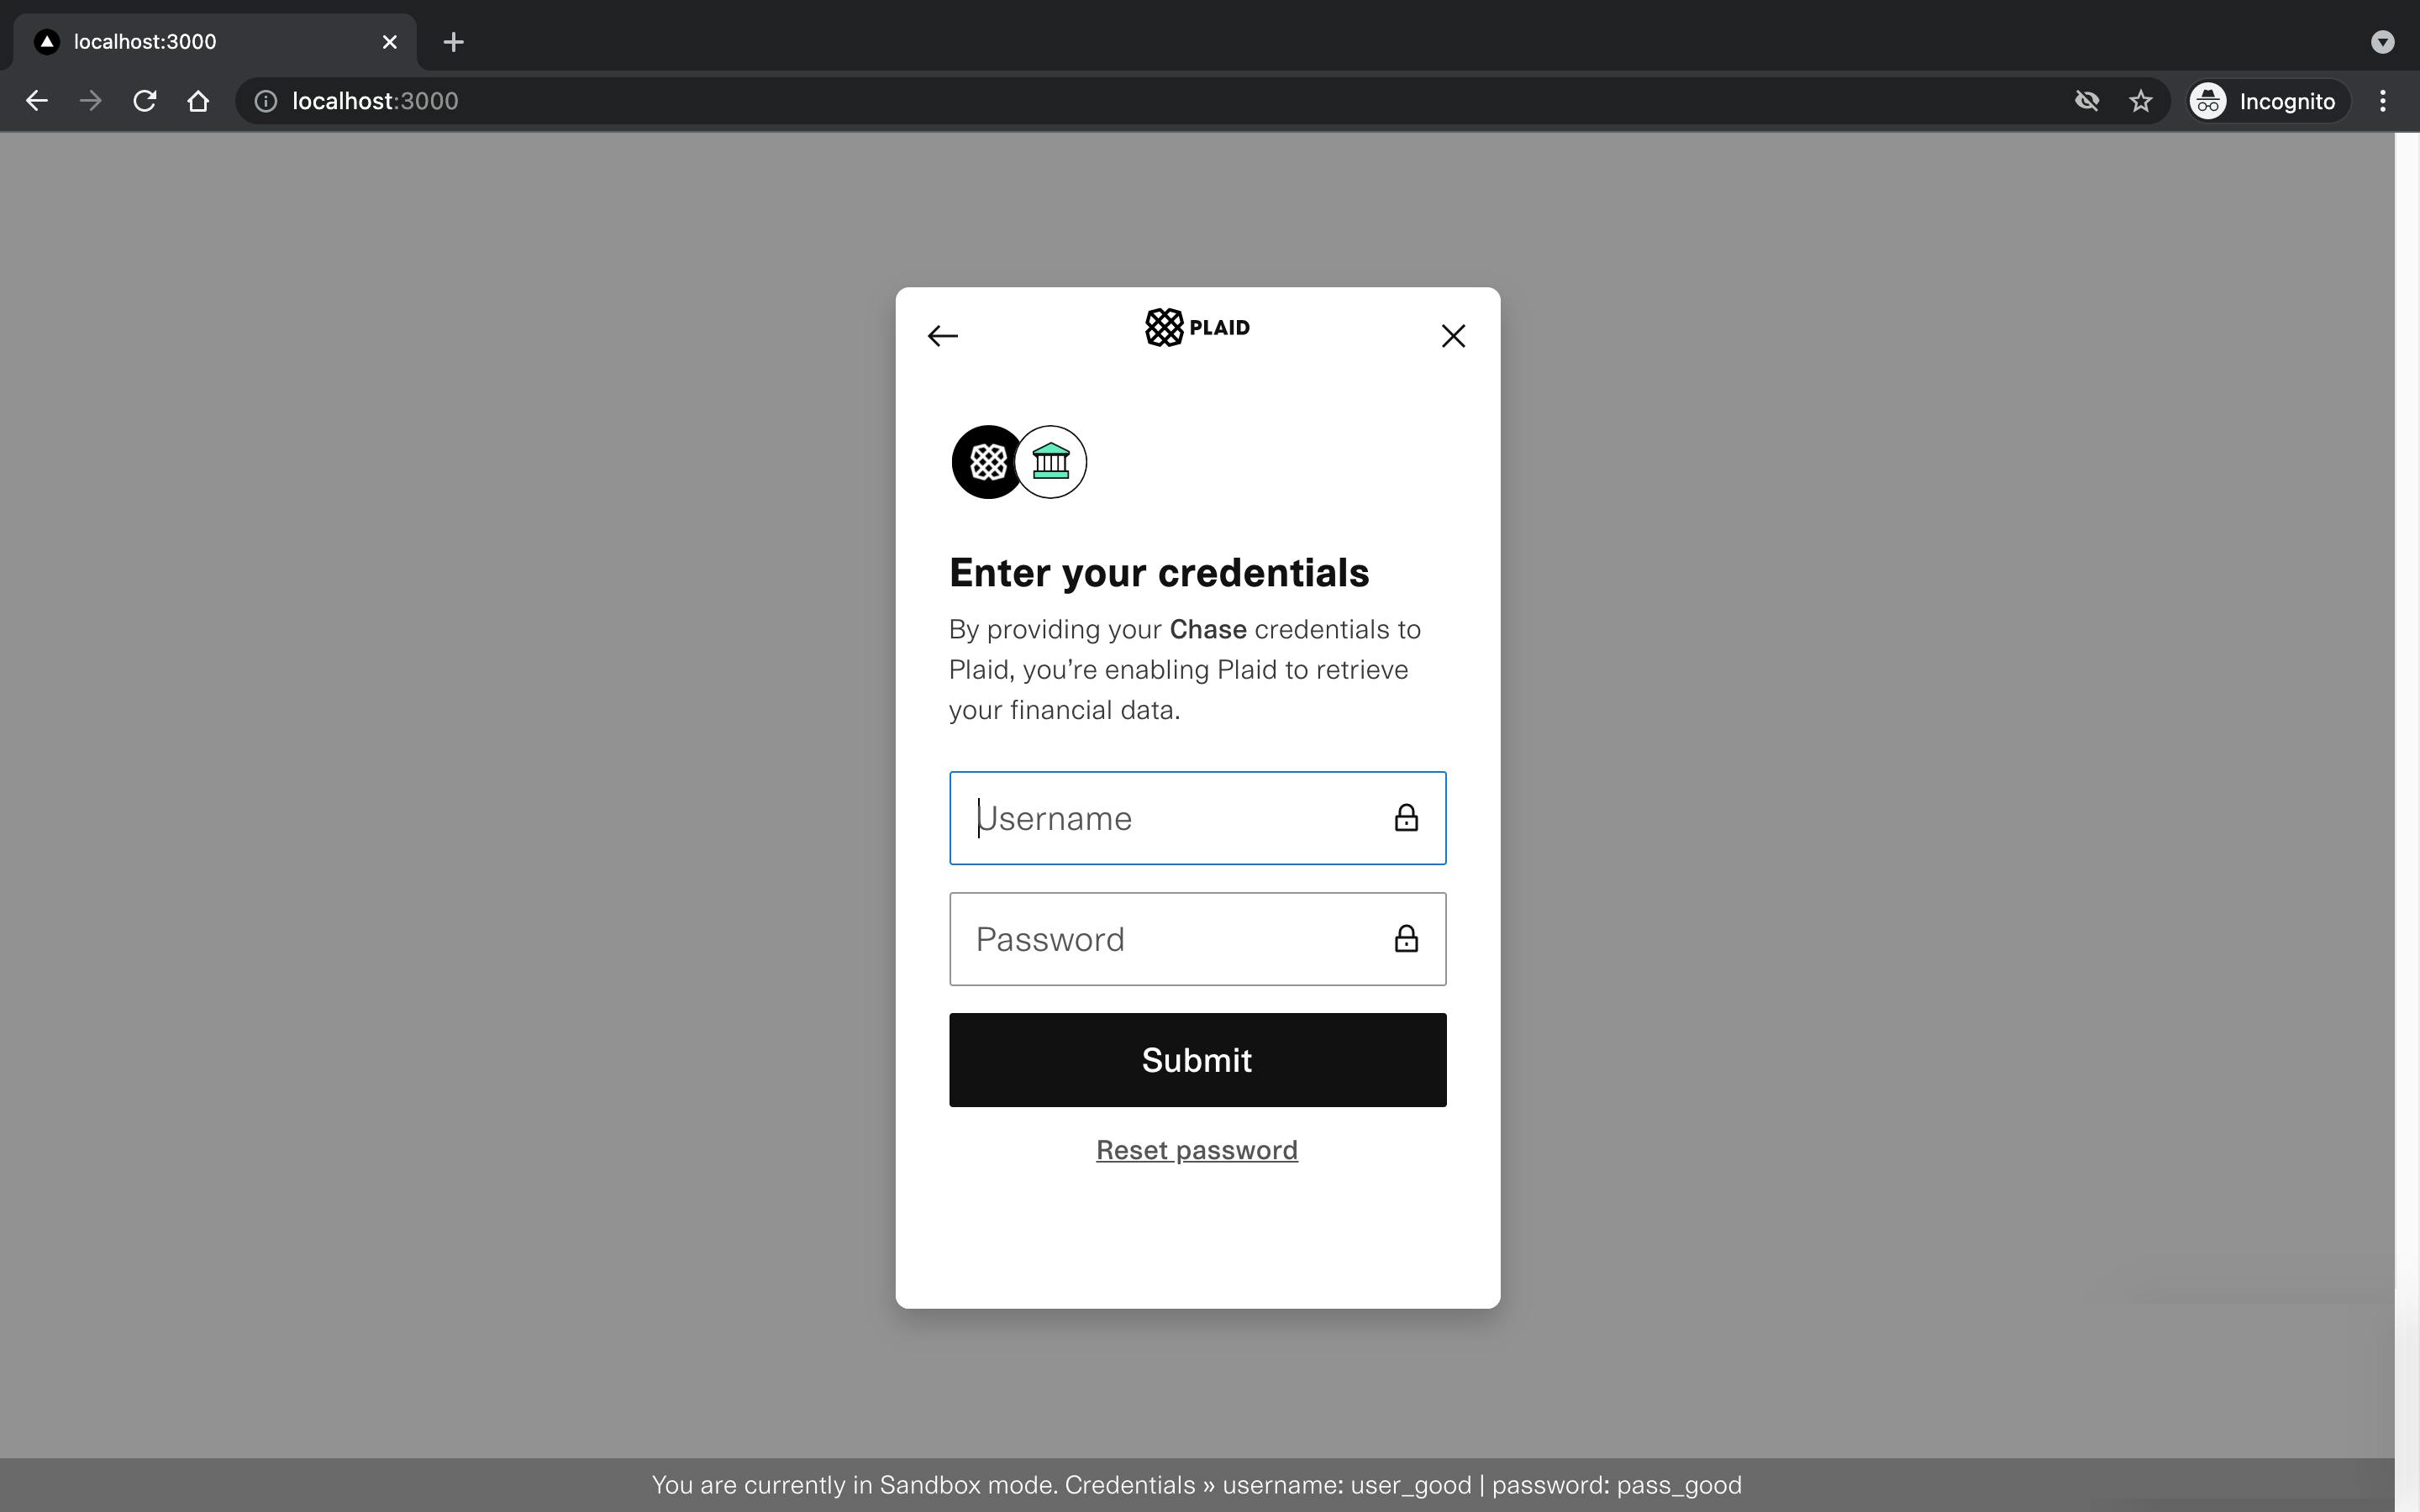 Plaid generated login step 3
 Plaid generated login step 4
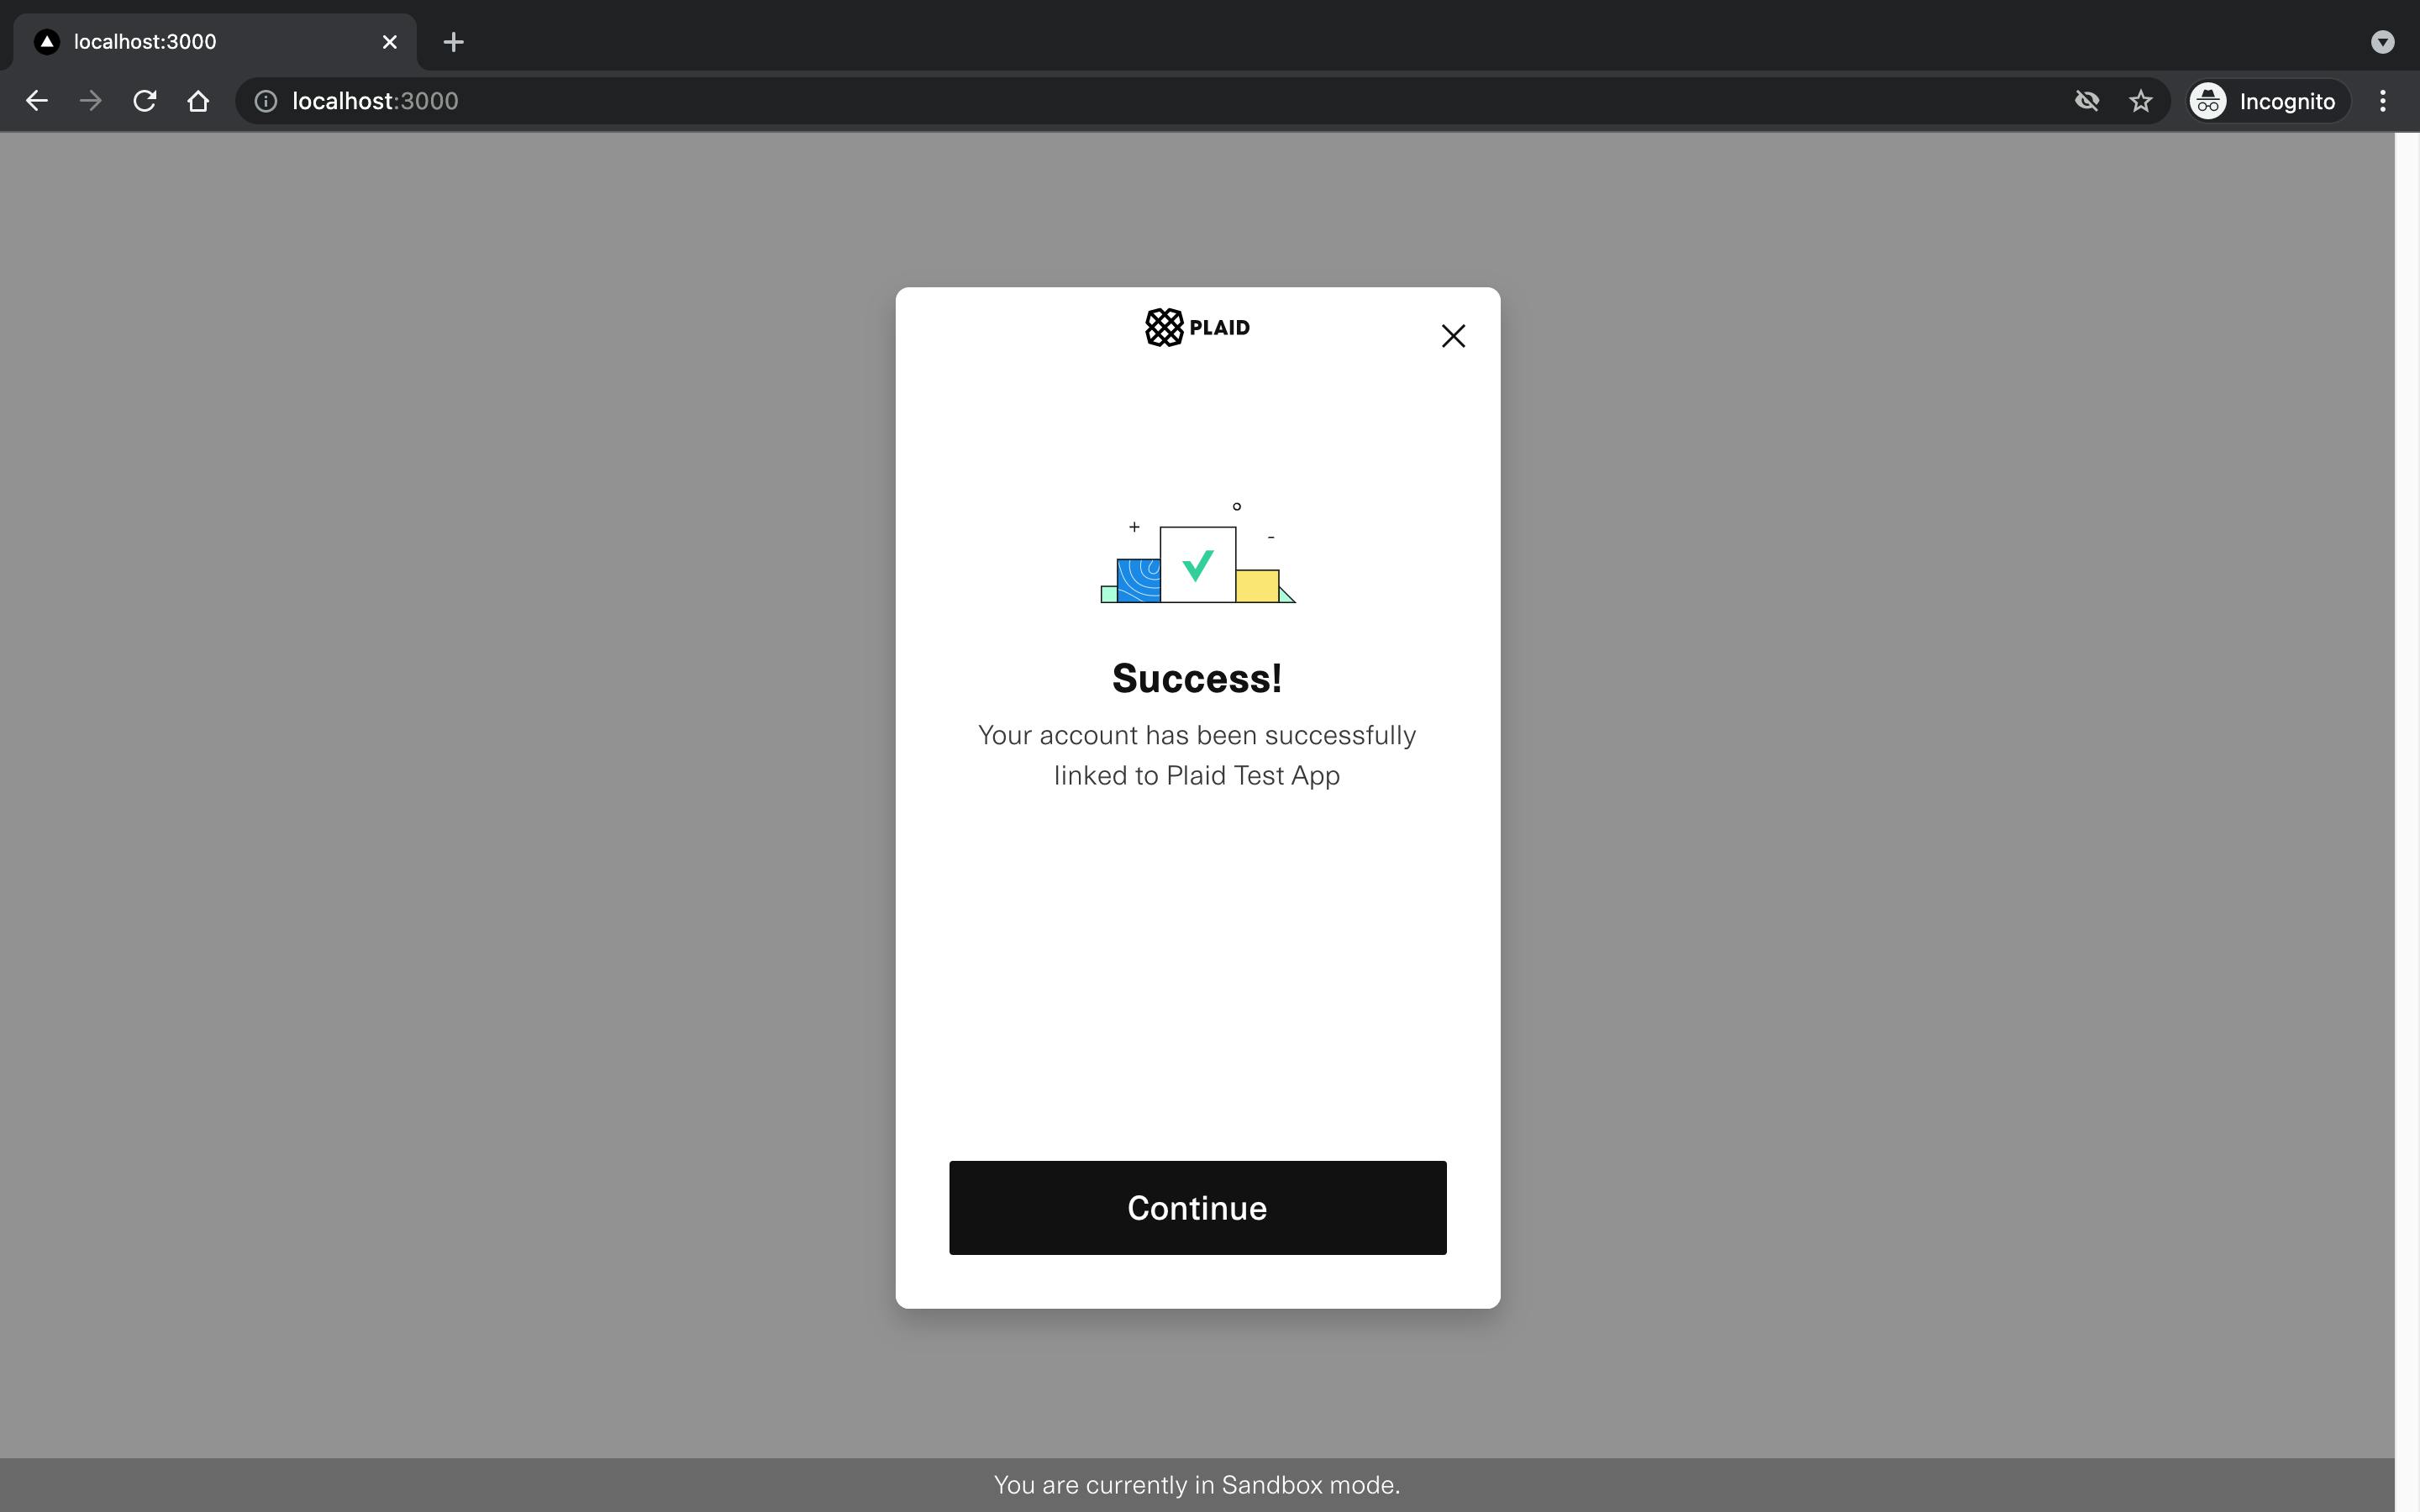 Plaid generated login step 5
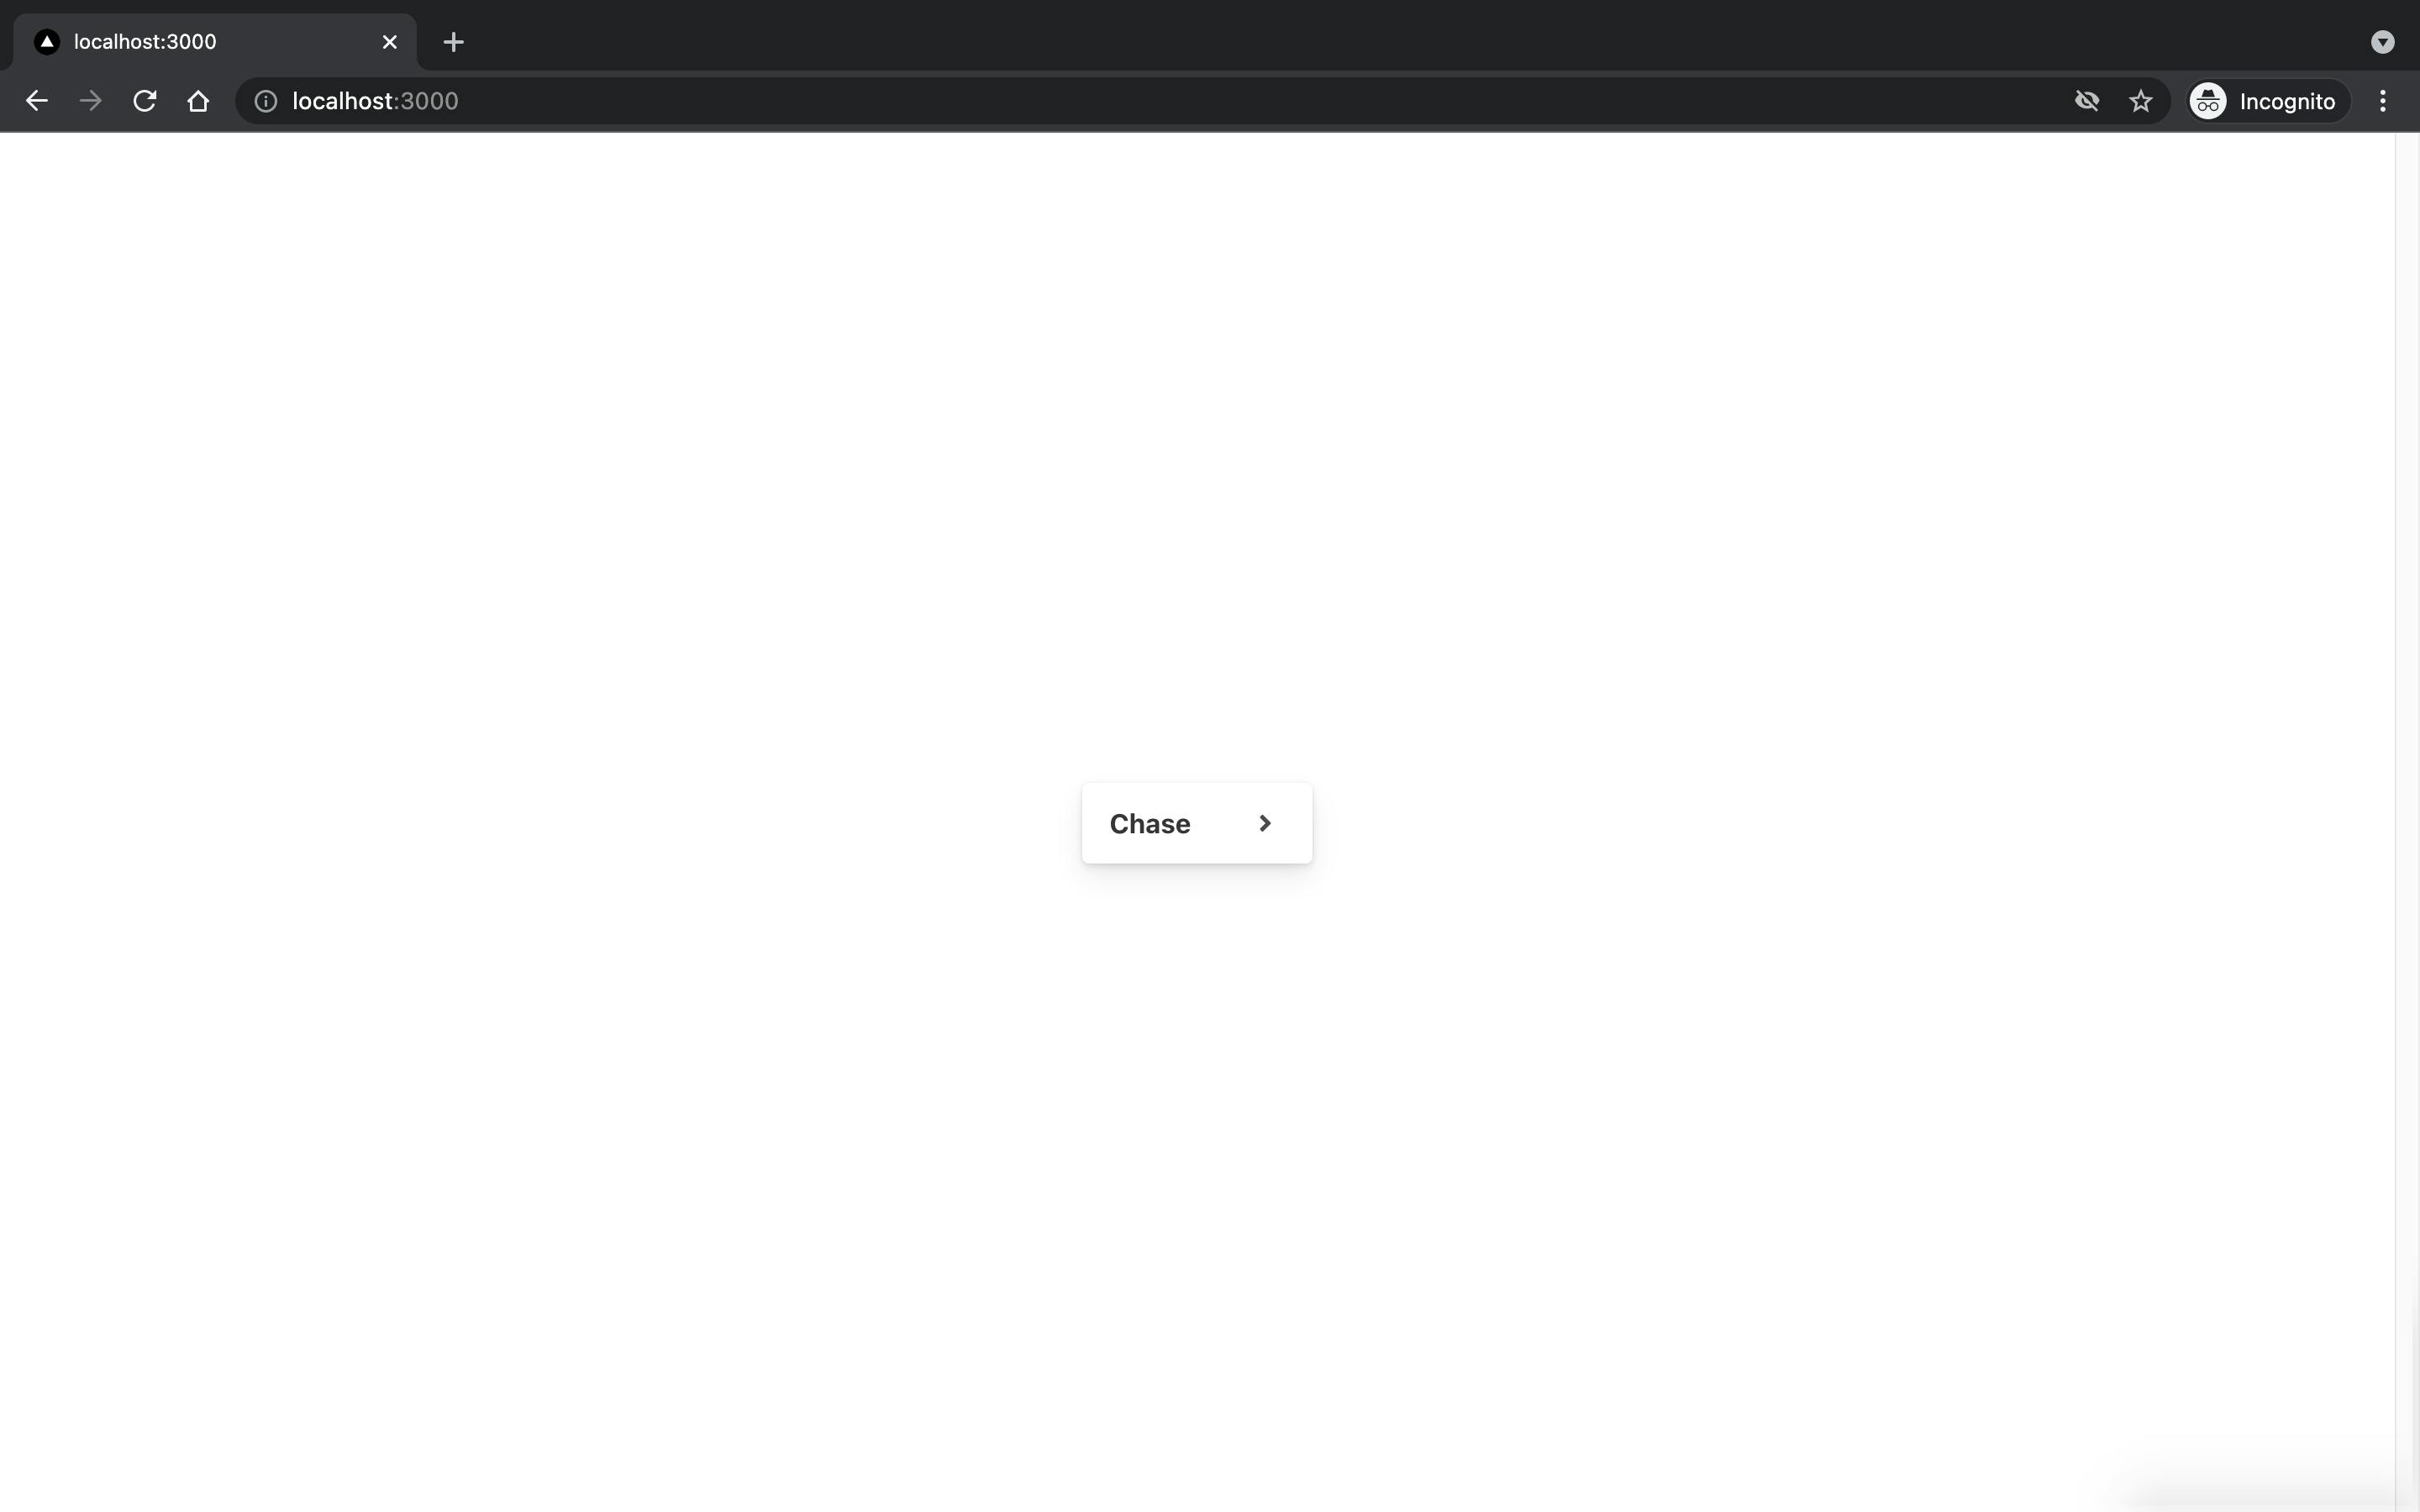 The main page with the choice of the bank
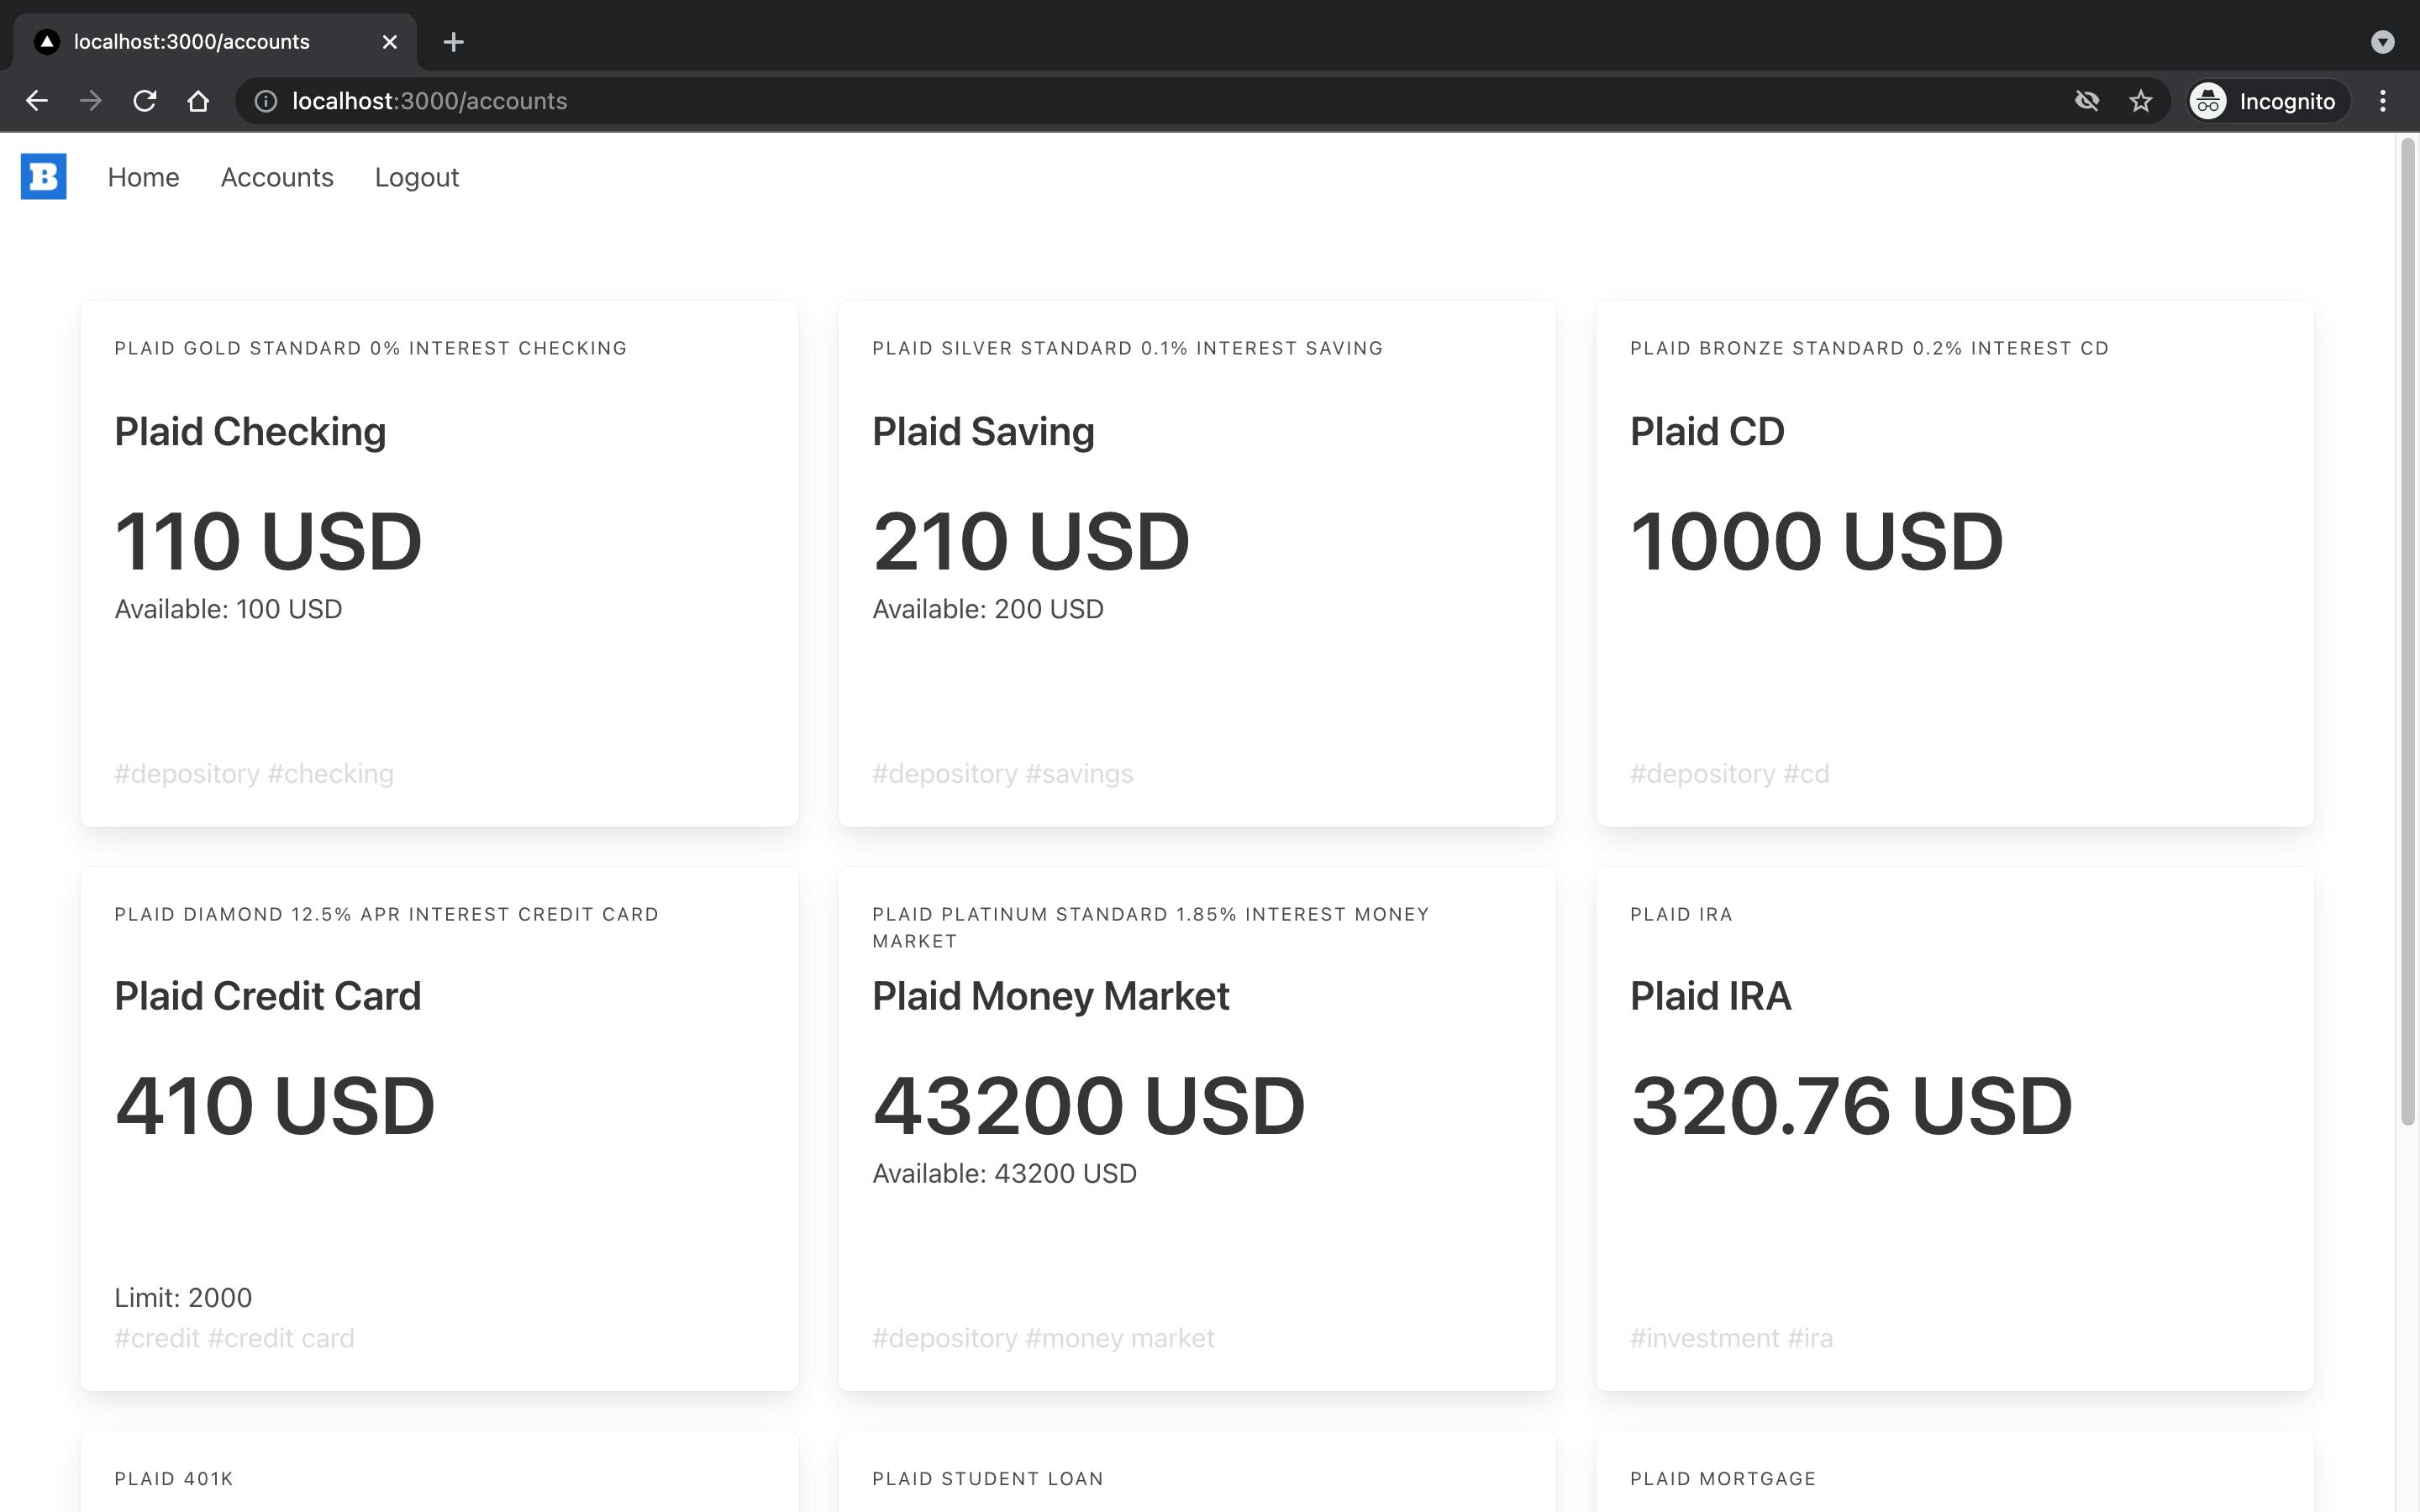 The list of the bank accounts
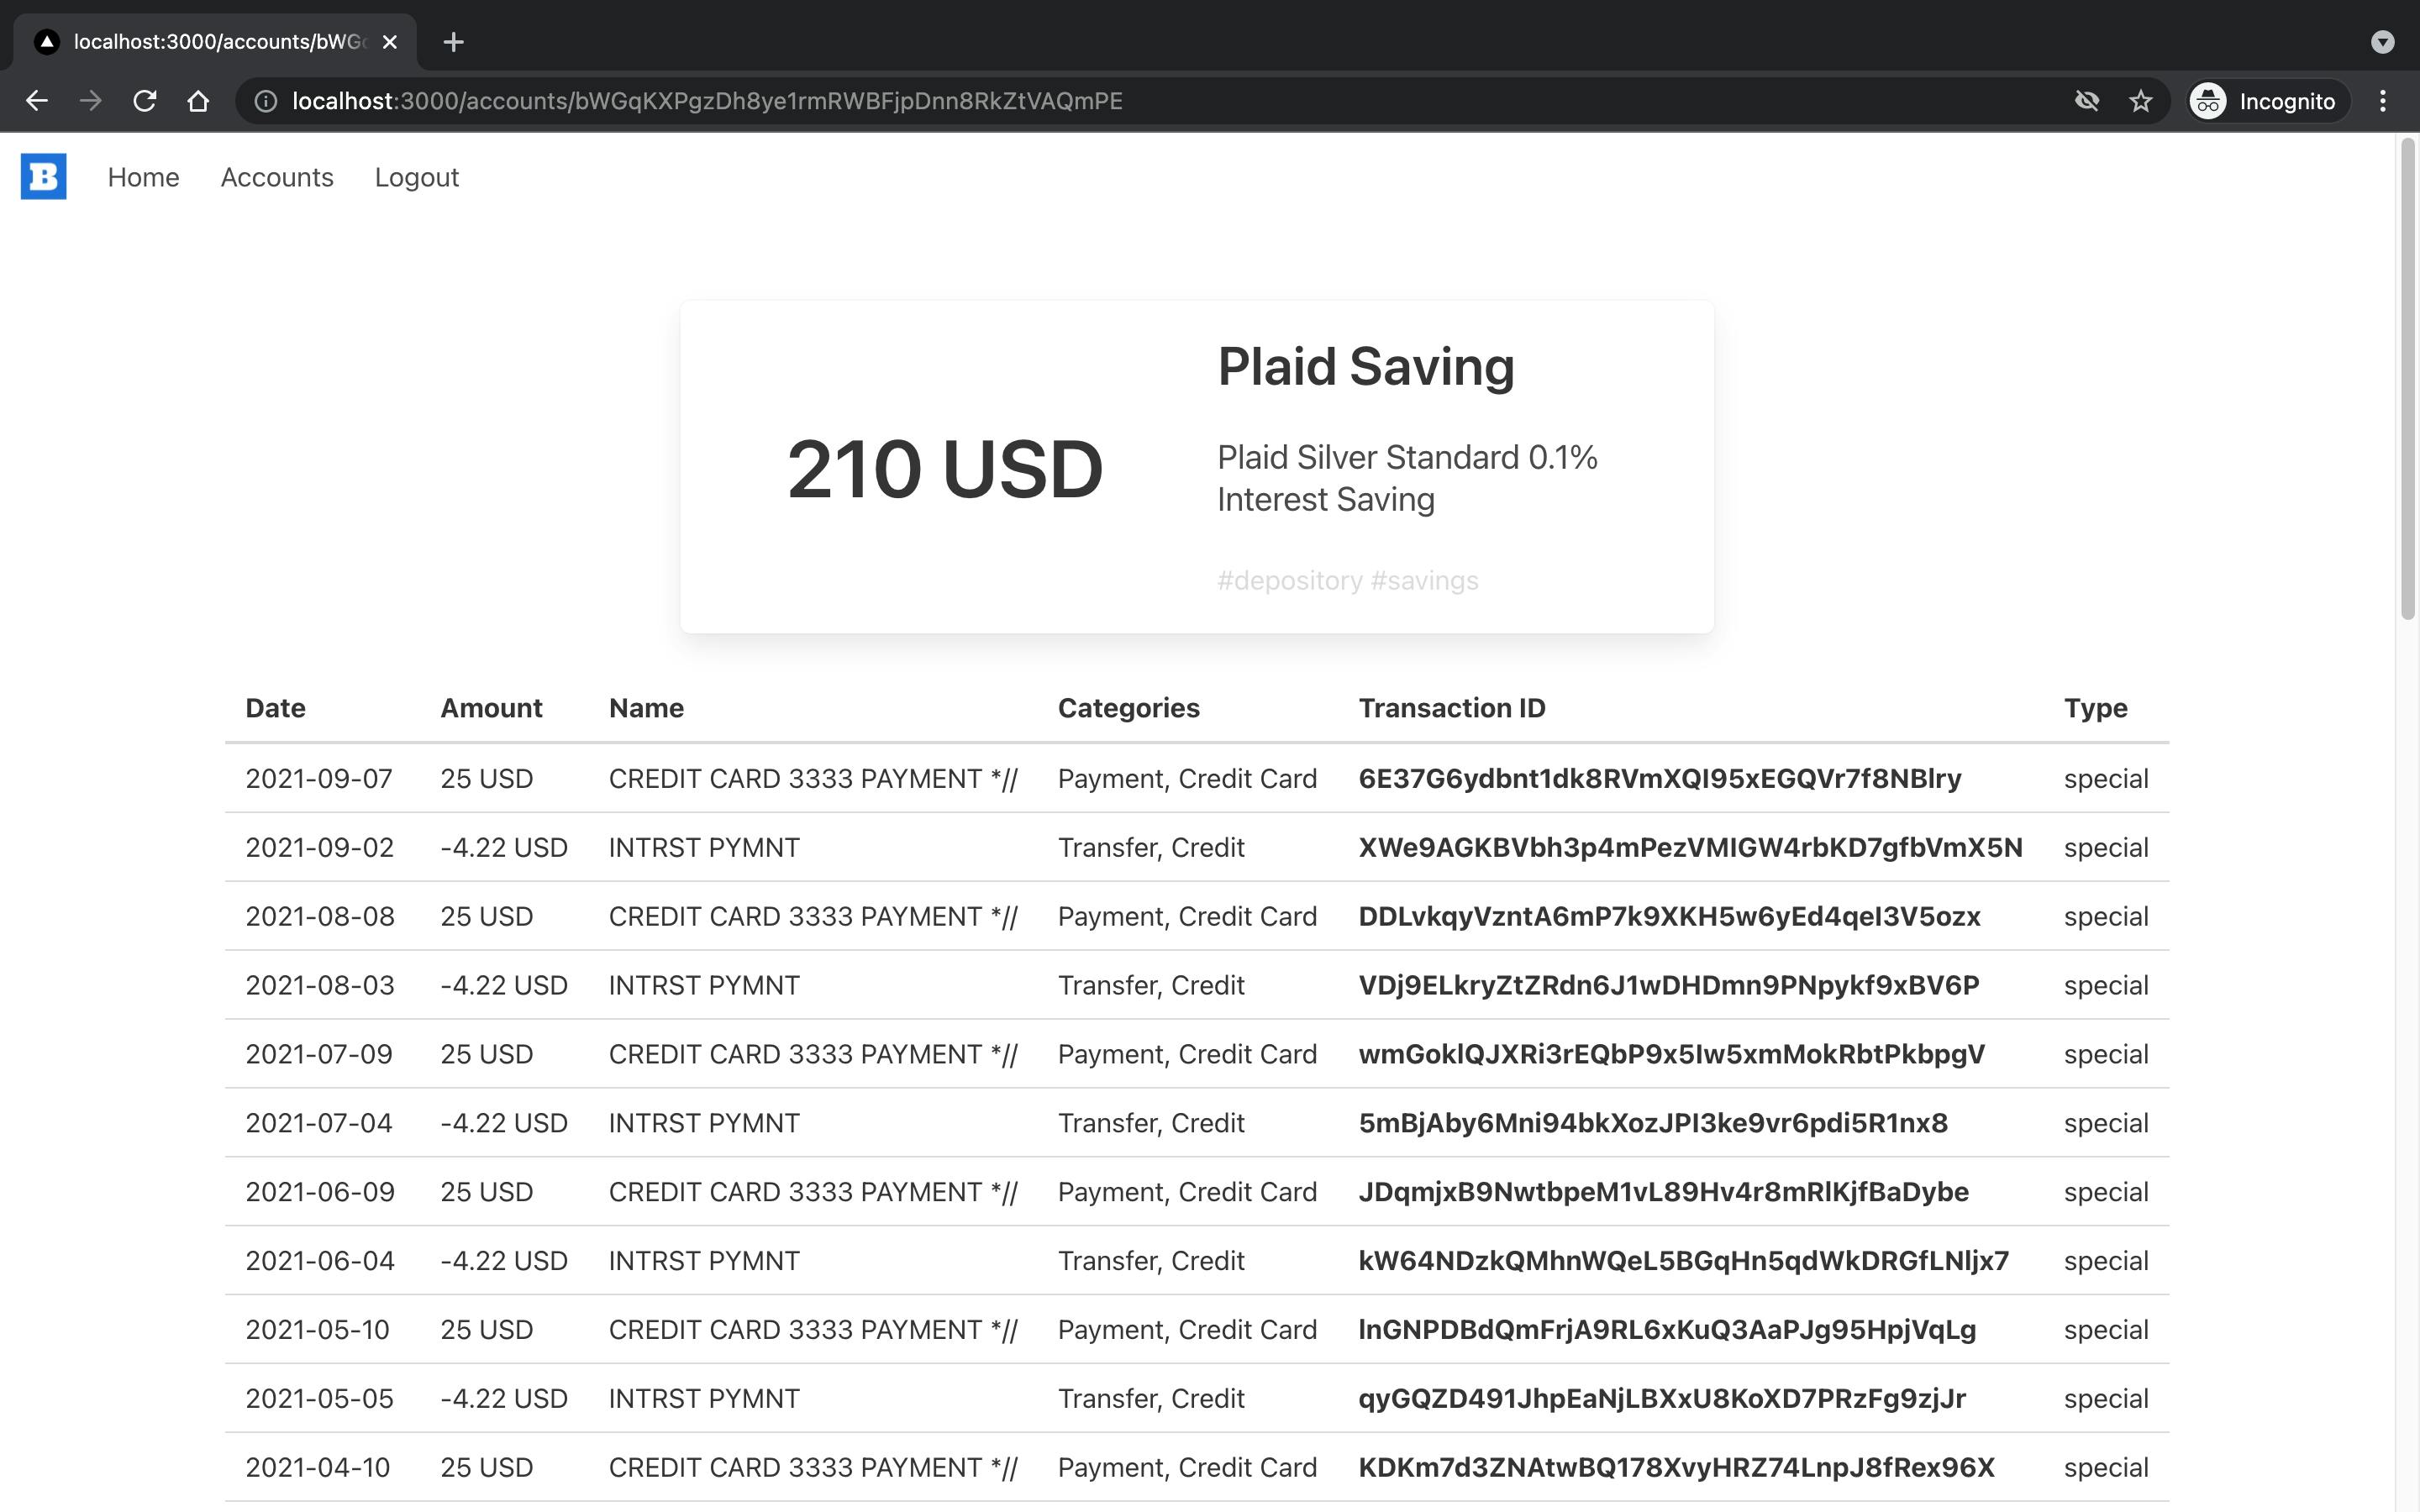 The account page
5. Technologies used in the project; little introduction to Node.js, Express.js, API, React and Next.js, Bulma.io, Sass
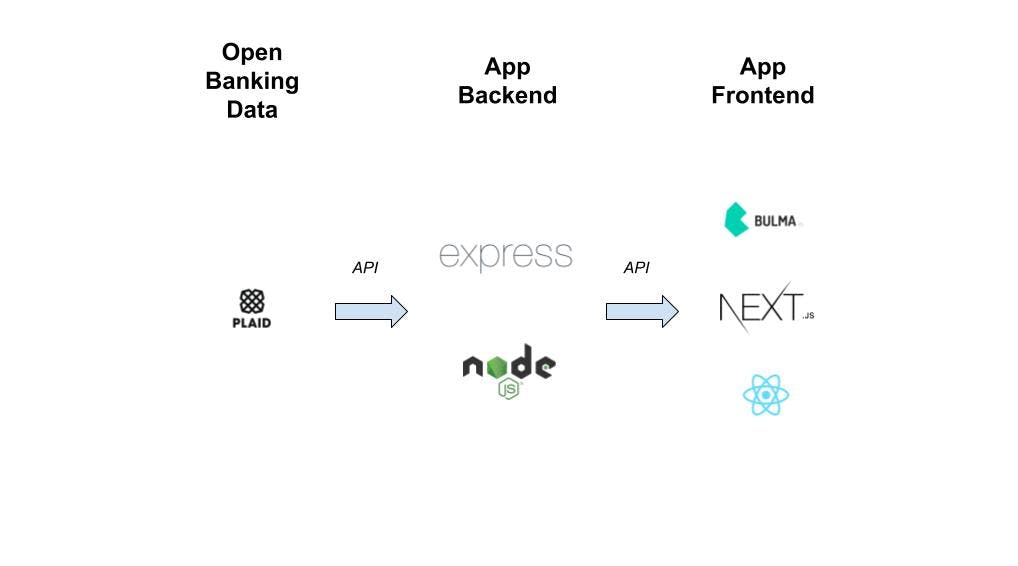 Technologies used in the app
With Plaid API, you can integrate the user's bank account with the app, get access to the user's data such as balances, assets or history of transactions as well as initiate transactions. The interaction is done through API, which stands for Application Programming Interface. API is how software or computers communicate with each other following a set of rules (definitions and protocols). API, as the name says, is a programming interface. User interface is the way how a computer communicates with the person. Programming interface is how software or machines communicate with each other.
Node.js executes JavaScript outside the browser. It runs the code on the V8 engine (basically a computer program executing JavaScript code which is also used in browsers like Google Chrome). Node.js is used for command-line scripts and server-side scripting. Keep in mind, Node.js is not a JavaScript framework or library. It is a runtime environment.
The backend framework I am going to use is Express.js. It is one of the most commonly used solutions in the market. And probably also the most popular Node.js backend framework.
When it comes to frontend, I used Next.js which is a React framework with some extra features. React is a JavaScript library for building user interfaces. Next.js extends the features of React by facilitations in the frontend and development of the app, as well as, server-side rendering and static website generation. Check why it is cool to build Next.js apps here and here .
I used Bulma.io as a CSS framework for frontend components in the app. But once again, I must emphasize that UI and UX were not my main focus. If you want to learn about Bulma.io or how UI/UX should look like, this article will not be the best place to do that.
My style sheets are in Sass format. Sass is, again, like an extended CSS. It makes writing styles more powerful. Did we necessary needed it in this app? Well, I am not sure about that. CSS probably would be enough but I really like Sass syntax. How to use Sass in Next.js is described here.
In a nutshell, the backend will interact with Plaid API and the frontend will request the data from backend API endpoints. The UI of the user will be component-based using responsive Bulma.io elements.
If you are familiar with Next.js, you may realize that we do not necessarily need Express.js to make the app work. I chose the option of running two servers. In 2021 and with Next.js custom servers in place it is a matter of personal preference.
6. Plaid API overview
I have already introduced Plaid API. It is time to dive into slightly more technical details.
Plaid provides us with 3 environments: sandbox, development and production. In this article, we will go with the sandbox environment.
First of all, you need to register yourself to receive client ID and client secret.
Plaid uses OpenAPI specification as their RESTful API standard. All the responses come in JSON.
If you dive into the docs you will notice that most probably you will be using client API libraries. Some of them were built by Plaid (Node.js, Python, Ruby, Java, Go) and some of them by the community of users (e.g. Haskell, .NET and Rust). You could also try using API without the libraries. I would recommend taking a look at Plaid Postman collection.
There are also Plaid Client SDKs. They are used in the frontend during the login process. For now, there are client SDKs available for iOS, Android, React Native and React and JavaScript. I will describe the login process in detail later in this article.
Of course, we are going to use client API libraries for Node.js and client SDK for React.
In November 2021 the list of endpoints includes:
- Product endpoints
- Item endpoints (item is login in a financial institution; a user can be logged into many institutions and have many logins for one institution - that means many items)
- Institution endpoints
- Account endpoint (in this case, the account is one that is held at a financial institution)
- Token endpoints
- Processor endpoints (they are used for Plaid integrations such as Stripe or Wyre; the most interesting list is here)
- Sandbox endpoints (made for sandbox testing scenarios such as testing a bank transfer or firing webhook)
- Employer endpoints
In this article, we will use token, item, product, account and institution endpoints.
In November 2021 developers can take advantage of a long list of products:
- Transactions
- Auth (bank account information)
- Balance
- Identity
- Assets
- Investments
- Liabilities
- Payment Initiation
- Bank transfer
- Deposit Switch (switching the accounts where a user wants to receive direct deposits)
- Income
I recommend you to read very well-written Plaid docs for more information.
7. Plaid login
Plaid login requires action in both the backend and the frontend.
The purpose of this process is to log into a financial institution (financial institution login is an item, as mentioned before) and receive an access token assigned to that specific item. Thanks to having a correct access token, we will be able to successfully communicate with Plaid API.
To start, we need to enable login for the user through Plaid. Plaid Link is the frontend component used to link users' bank accounts with Plaid. This is what you have seen in the screenshots above with the description Plaid generated login.
To initialize Link we need a link token which we create by calling /link/token/create. The link token expires after 30 minutes. After receiving it, we open Link in the frontend. Users will see a Plaid made modal where will input their credentials.
It is SDK that helps in the entire process. We will use specifically SDK for React but there are also other SDKs mentioned before.
Since we are using the sandbox, the only thing we would need to do here is to choose a bank (I usually choose Chase) and to insert login user_good and password pass_good. However, when logging into the real accounts, there is a much higher chance that users will need to go through OAuth 2.0 authentication on the bank website. You will need some more steps to take then.
After the successful login Link will generate a public token. It expires after 30 minutes. The purpose of a public token is to be exchanged for item and access token. We do it by calling /item/public_token/exchange.
If everything goes successful, we will receive an access token. It is not set to expire. Nevertheless, not implementing updates/refresh/logouts is not what is recommended. It might be even not compliant with the regulations. European institutions require 90-days reauthentication.
Since we are using a sandbox, there will be no implementation of updates/refresh/logouts. But if you build a production app, you should rally think about it.
8. API strategy, double-backend/proxy API, HttpOnly cookie, chart of the calls
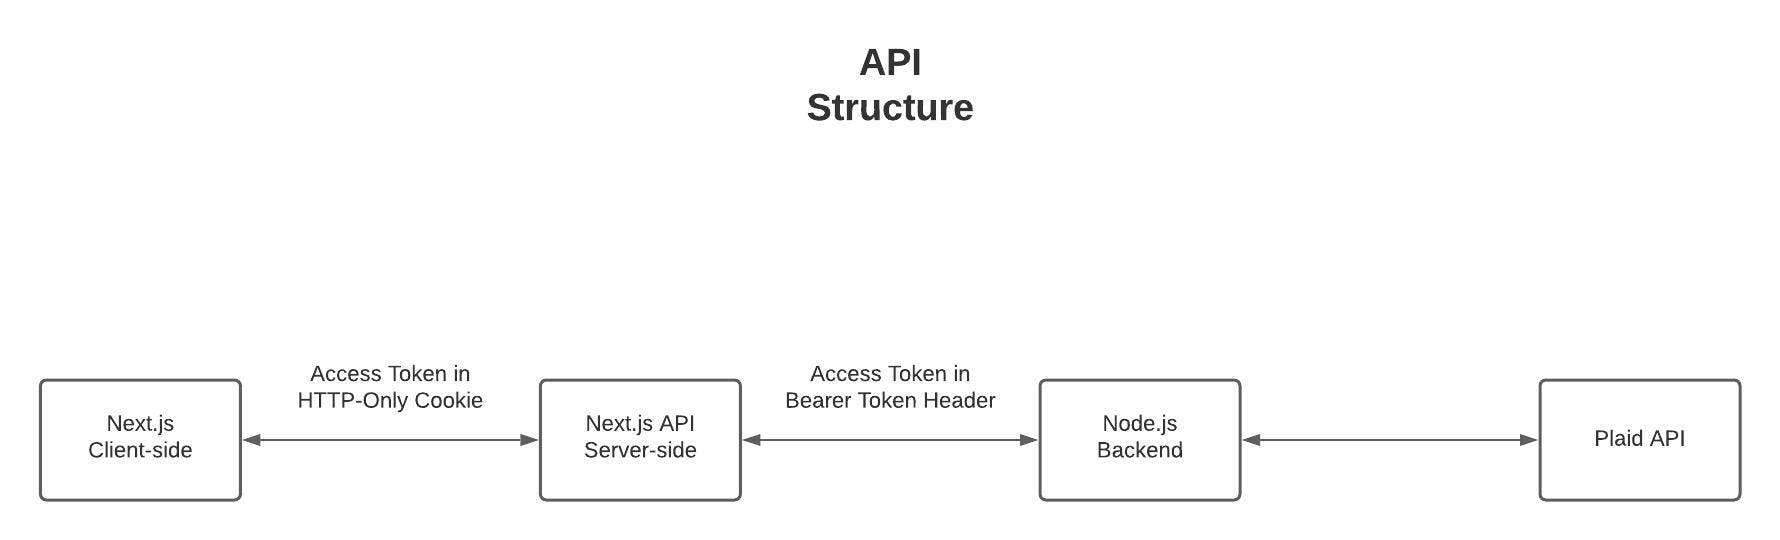 API structure in a simple diagram
As mentioned before, Next.js server will be used as a kind of proxy server between the backend and the client-side. The inspiration for this architecture was this article. The author of the article did it a bit differently. However, one thing is the same; http-only cookies strategy.
There are many ways how an access token can be stored. It could be for example, client-side or localStorage. When it comes to the client-side, it would not be a user-friendly solution because of the need to log in very often.
Local storage makes more sense. The values are stored in computer memory.
But more secure solution are http-only cookies. Such a cookie cannot be read by the client-side scripts (document.cookie). Only the server can access the value of the cookies. It is safer when it comes to preventing XSS attacks. React does pretty well when it comes to preventing XSS attacks but is not perfect (well, nothing is perfect, even Next.js). Unfortunately, HTTP-only cookies are not immune to CSRF attacks. The myth of the perfection of HTTP-only cookies was debunked in articles like this one.
What is good is that when it comes to the Next.js app, it has the same origin and we did nothing to change the default setting of the request to the Next.js server which has same-origin header. That means that thanks to CORS settings we significantly decrease the risks of CSRF attack. Read more about how it works in this fantastic article.
When it comes to Plaid Link it is Plaid app that handles security side.
Of course, in this app, the worst that could happen is that someone would be able to read your (fake) account data or log you out from the app. But it is good to think about it in advance. If you want to be really safe you could implement more protection on the backend.
9. List of required data, the overview of API endpoints
We will need endpoints for logging in, logging out, to get the name of the institution to which we logged in, the list of accounts that are associated with the item, the balance of the account and the list of the transactions of the account. You can see the data and all the endpoints below:
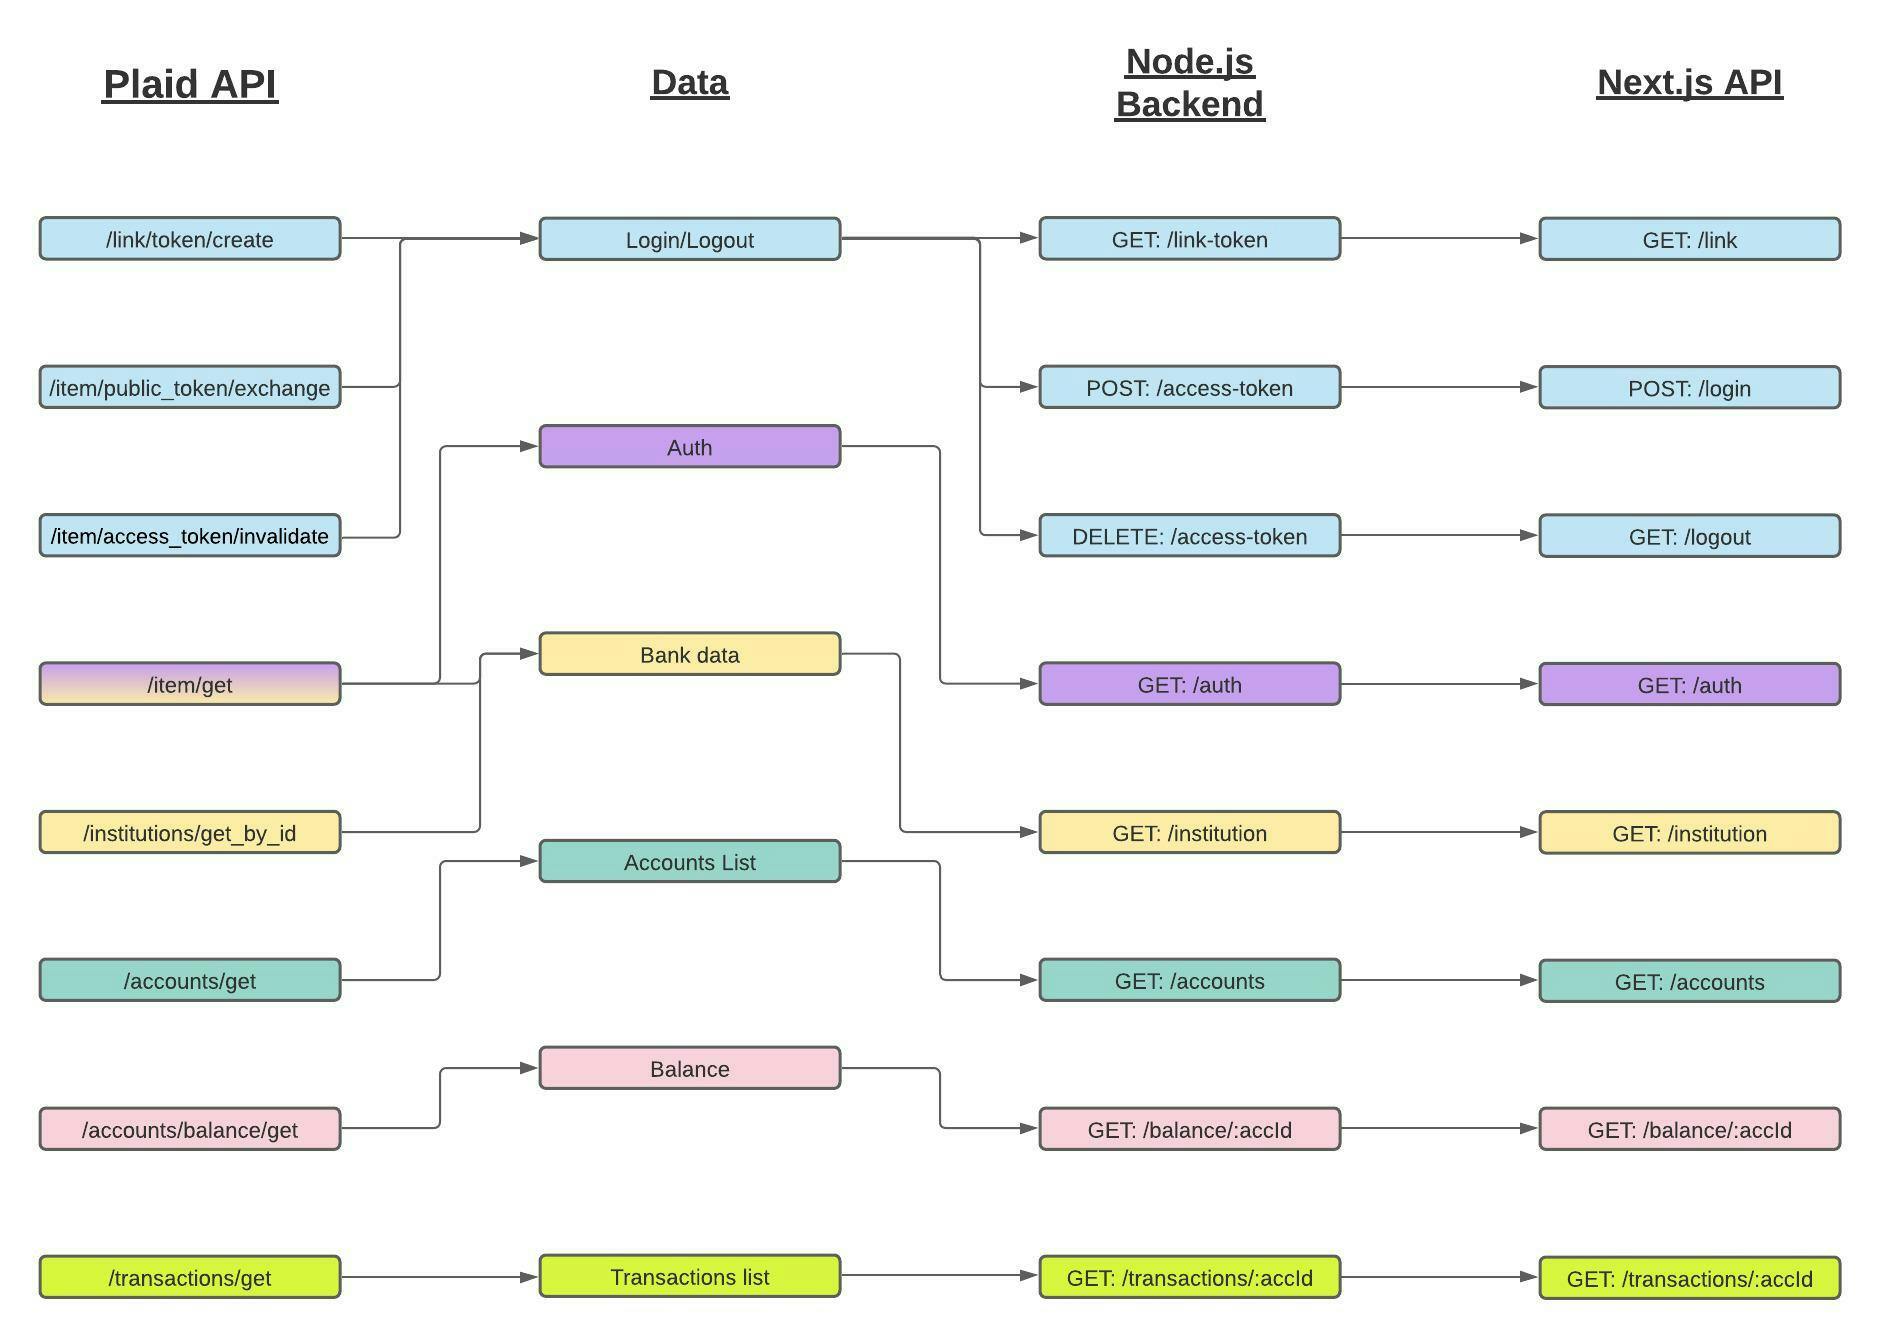 API Diagram
10. Backend folder structure
A good folder and files structure and organization helps a lot with the maintenance of the code. And I cannot deny - in this project I put the readability and ability to maintain the code as a priority (over the performance).
My inspiration for Express.js app folder organization were these articles: Bulletproof node.js project architecture and Node.js project architecture best practices.
Summarizing both of the articles very briefly, you want to separate data access, business logic (the part of the app which handles rules, constraints, transformations with regard to the data) and routes (forwards requests received through a specific URL and method such as GET or POST).
Controllers are the functions that handle the requests which are received through routes. It is similar to what happens in the MVC pattern (even if we will not use the MVC pattern here).
So we do not want any business logic in controllers.
Business logic will be placed in the folder called services. Even though at this stage there will not be much done there, it will be a great starting point for future development of the app. Most of the response from Plaid API consists of redundant data. It could be transformed there. Another thing to add is the writing to the log.
What is a challenge in our app is how we treat the data received from Plaid API. On the one hand, this is our database at this stage. We do not receive data from any other source. But on the other hand, it is still the third-party API. What if in the future we would want to change it and have our own database, other third-party API requests etc.?
That is why I decided that we go with Plaid API as a third-party API. If we want to build a more advanced Plaid banking aggregation app, it would be natural to have registered users in our database with many Plaid items assigned to their accounts. Access tokens also will need to be handled in a different way. Most likely you will want to save a hashed version of them in a database.
Therefore calls to Plaid API are made in subscribers borrowed from publisher/subscriber pattern. We will treat user requesting an item/login or Plaid data as an event.
In the folder structure, there will be also a separate part for middleware and libs (which are some helper functions and classes).
.
├── app.js
├── libs
│   ├── PlaidClient.js
│   ├── bearerTokenExtractor.js
│   ├── errors
│   │   ├── OperationalCustomError.js
│   │   ├── PlaidError.js
│   │   └── ProgrammingCustomError.js
│   └── verifyStartEndDateFormat.js
├── middleware
│   ├── bearerTokenHandler.js
│   └── errorHandler.js
├── package-lock.json
├── package.json
├── routes
│   └── index.js
├── services
│   ├── deleteAccessToken.js
│   ├── getAccounts.js
│   ├── getAuth.js
│   ├── getBalance.js
│   ├── getInstitution.js
│   ├── getItem.js
│   └── getTransactions.js
└── subscribers
    ├── plaidAuth
    │   ├── accessToken.js
    │   └── linkToken.js
    └── plaidEndpoints
        ├── accounts.js
        ├── balance.js
        ├── institution.js
        ├── item.js
        └── transactions.js
11. Error handling in the backend
Node.js consists of a built-in error object. I have decided to create a custom error class which is a child of a built-in error one.
There are two types of errors: operational (runtime errors such as invalid user input) and programmer errors (bugs). These are the custom errors we will create. However, I have also added the third one, which is PlaidError. I want to handle PlaidErrors separately and be able to transform the data to the format I want. This is the example of the error we receive from Plaid API:
{
    "name": "PlaidError",
    "display_message": null,
    "documentation_url": "https://plaid.com/docs/?ref=error#invalid-request-errors",
    "error_code": "MISSING_FIELDS",
    "error_message": "the following required fields are missing: public_token",
    "error_type": "INVALID_REQUEST",
    "request_id": "kJFz47TjtTduaWt",
    "suggested_action": null,
    "status_code": 400
}
Error is caught by the error-handling middleware (more about middleware in the next chapter). The error handling function is defined as the last. You can find the details of how to do it in the express.js documentation.
Keep in mind that an operational error that is not handled becomes a programmer error.
Another important thing is that if you get a programmer error, you just want to crash the app to avoid working with invalid data.
When it comes to the error codes, types, I tried to follow Node.js naming patterns. You can find Node.js error codes and types here.
Custom error classes include the methods which sent the response or crash the app (in the case of programmer error/ProgrammingError).
// ./app.js

const express = require('express')
const cors = require('cors')

require('dotenv').config()

const router = require('./routes/index')

const errorHandler = require('./middleware/errorHandler')


const app = express()
const port = process.env.PORT

app.use(cors())
app.use(express.json())
app.use(express.urlencoded({ extended: true }))
app.use('/', router)
app.use(errorHandler)

app.listen(port, () => {
  console.log(`Example app listening at http://localhost:${port}`)
})
// ./middleware/errorHandler.js

const PlaidError = require('../libs/errors/PlaidError')
const ProgrammingCustomError = require('../libs/errors/ProgrammingCustomError')


const errorHandler = (err, req, res, next) => {
    try {
        if (err.name === 'PlaidError') {
            const plaidError = new PlaidError(err)
            plaidError.apiResponse(res)
        }
        else if (err.name === 'OperationalCustomError') {
            err.apiResponse(res)
        } else {
            const programmingCustomError = new ProgrammingCustomError(err)
            programmingCustomError.apiResponse(res)
        }
    } catch (error) {
        const programmingCustomError = new ProgrammingCustomError(error)
        programmingCustomError.apiResponse(res)
    }
}


module.exports = errorHandler
// ./libs/errors/ProgrammingCustomError.js

class ProgrammingCustomError extends Error {
    constructor(error) {
        const displayMessage = "Something went wrong"
        const devMessage = error.message ? error.message : displayMessage

        super(displayMessage)

        this._name = error.name ? error.name : "UnknownError"
        this._devMessage = devMessage
        this._status = error.statusCode ? error.statusCode : 500
        this._code = error.code ? error.code : "UNKNOWN_ERROR_CODE"
        this._type = error.type ? error.type : "UNKNOWN_ERROR_TYPE"
    }

    get name() {
        return this._name
    }

    get status() {
        return this._status
    }

    get code() {
        return this._code
    }

    get type() {
        return this._type
    }

    apiResponse(res) {
        res.status(this._status)
        res.send({
            "name": this._name,
            "message": this.message,
            "code": this._code,
            "type": this._type
        })
        console.error(this.stack)
        process.exit(0)
    }
}


module.exports = ProgrammingCustomError
// ./libs/errors/OperationalCustomError.js


class OperationalCustomError extends Error {
    constructor(status, displayName, code, type, message) {
        super(message)

        this._name = "OperationalCustomError"
        this._displayName = displayName
        this._status = status
        this._code = code
        this._type = type
    }

    get name() {
        return this._name
    }

    get status() {
        return this._status
    }

    get code() {
        return this._code
    }

    get type() {
        return this._type
    }

    apiResponse(res) {
        res.status(this._status)
        res.send({
            "name": this._displayName,
            "message": this.message,
            "code": this._code,
            "type": this._type
        })
    }
}


module.exports = OperationalCustomError
// ./libs/errors/PlaidError.js


class PlaidError extends Error {
    constructor(plaidErrorJson) {
        const displayMessage = plaidErrorJson.display_message ? plaidErrorJson.display_message : "Something went wrong with Plaid"
        const devMessage = plaidErrorJson.error_message ? plaidErrorJson.error_message : displayMessage

        super(displayMessage)

        this._name = plaidErrorJson.name ? plaidErrorJson.name : "PlaidError"
        this._devMessage = devMessage
        this._requestID = plaidErrorJson.request_id ? plaidErrorJson.request_id : null
        this._status = plaidErrorJson.status_code ? plaidErrorJson.status_code : 500
        this._code = plaidErrorJson.error_code ? plaidErrorJson.error_code : "PLAID_ERROR"
        this._type = plaidErrorJson.error_type ? plaidErrorJson.error_type : "UNDEFINED_PLAID_ERROR"
        this._suggestedAction = plaidErrorJson.suggested_action ? plaidErrorJson.suggested_action : null
        this._documentationURL = plaidErrorJson.documentation_url ? plaidErrorJson.documentation_url : null
    }

    get name() {
        return this._name
    }

    get requestID() {
        return this._requestID
    }

    get status() {
        return this._status
    }

    get code() {
        return this._code
    }

    get type() {
        return this._type
    }

    get suggestedAction() {
        return this._suggestedAction
    }

    get documentationURL() {
        return this._documentationURL
    }

    apiResponse(res) {
        res.status(this._status)
        res.send({
            "name": this._name,
            "requestID": this._requestID,
            "message": this.message,
            "code": this._code,
            "type": this._type,
            "suggestedAction": this._suggestedAction,
            "documentationURL": this._documentationURL
        })
    }
}


module.exports = PlaidError
If you want to know more details with regards to good error handling in Express.js, read this article.
12. Backend middleware and bearer token extractor
In the previous chapter, we worked with error handling middleware. It is the code that executes in the middle of the request. We usually execute the middleware before the controller (but in the error handling example you saw the middleware executed after the controller). Here there is a fantastic article and video if you want to learn the basics of express.js middleware and to understand it well (including a deep understanding of the next function). You can also read more about middleware in express.js docs.
Our middleware will be checking whether the bearer access token is included in the header. If not I throw an error.
But if it is included, I extract the header and pass it in the res.locals variable. This is how you pass variables from the middleware to the controller.
// ./middleware/bearerTokenExtractor.js

const bearerTokenExtractor = require('../libs/bearerTokenExtractor')

const OperationalCustomError = require('../libs/errors/OperationalCustomError')


const bearerTokenHandler = (req, res, next) => {
    if (req.headers.authorization) {
        res.locals.accessToken = bearerTokenExtractor(req.headers.authorization)
        next()
    } else {
        throw new OperationalCustomError(401, 'TokenError', 'ERR_NO_TOKEN', 'INVALID_REQUEST', 'No token received')
    }
}


module.exports = bearerTokenHandler
// ./libs/bearerTokenExtractor

const bearerTokenExtractor = (fullAuthorizationHeader) => {
    return fullAuthorizationHeader.split("Bearer ")[1]
}


module.exports = bearerTokenExtractor
In order to apply middleware functions to specific routes, you need to include them in the routes before the controller functions. Since my controller functions are very straightforward and it does not look like they will be different, I did not create a separate folder for them. createLinkToken and getAccessToken are imported from subscribers because they are Plaid functions that will not be modified in the future. The brackets around getAccessToken are placed there because we export two functions from that folder (one here and another one to deleteAccessToken). You will see it later in the post. If you want to learn more about module exports in Node.js read this simple explaination or a more detailed article on module exports.
// ./routes/index.js

const express = require('express')
const router = express.Router()

const bearerTokenHandler = require('../middleware/bearerTokenHandler')

const createLinkToken = require('../subscribers/plaidAuth/linkToken')
const { getAccessToken } = require('../subscribers/plaidAuth/accessToken')
const deleteAccessToken = require('../services/deleteAccessToken')
const getAccounts = require('../services/getAccounts')
const getInstitution = require('../services/getInstitution')
const getAuth = require('../services/getAuth')
const getTransactions = require('../services/getTransactions')
const getBalance = require('../services/getBalance')


router.get('/',
    async (req, res) => {
        try {
            const plainLinkData =  await createLinkToken()
            res.send(plainLinkData)
        } catch (error) {
            next(error)
        }
    }
)

router.post('/access-token',
    async (req, res, next) => {
        try {
            const accessToken = await getAccessToken(req.body.publicToken)
            res.send(accessToken)
        } catch (error) {
            next(error)
        }
    }
)

router.delete('/access-token',
    bearerTokenHandler,
    async (req, res, next) => {
        try {
            const response = await deleteAccessToken(res.locals.accessToken)
            res.send(response)
        } catch (error) {
            next(error)
        }
    }
)

router.get('/auth',
    bearerTokenHandler,
    async (req, res, next) => {
        try {
            const auth = await getAuth(res.locals.accessToken)
            res.send(auth)
        } catch (error) {
            next(error)
        }
    }
)

router.get('/accounts',
    bearerTokenHandler,
    async (req, res, next) => {
        try {
            const accounts = await getAccounts(res.locals.accessToken)
            res.send(accounts)
        } catch (error) {
            next(error)
        }
    }
)

router.get('/institution',
    bearerTokenHandler,
    async (req, res, next) => {
        try {
            const institution = await getInstitution(res.locals.accessToken)
            res.send(institution)
        } catch (error) {
            next(error)
        }
    }
)

router.get('/balance/:accountId',
    bearerTokenHandler,
    async (req, res, next) => {
        try {
            const accountTransactions = await getBalance(res.locals.accessToken, req.params.accountId)
            res.send(accountTransactions)
        } catch (error) {
            next(error)
        }
    }
)

router.get('/transactions/:accountId',
    bearerTokenHandler,
    async (req, res, next) => {
        try {
            const accountTransactions = await getTransactions(res.locals.accessToken, req.query, req.params.accountId)
            res.send(accountTransactions)
        } catch (error) {
            next(error)
        }
    }
)


module.exports = router
13. Backend code
Here you can see the rest of the code in the backend.
I have created a Plaid client class which is necessary for the requests. Environment variables are taken from the .env file using dotenv (you could see an import in ./app.js).
// ./libs/PlaidClient

const plaid = require('plaid')


const plaidClient = new plaid.Client({
    clientID: process.env.PLAID_CLIENT_ID,
    secret: process.env.PLAID_CLIENT_SECRET,
    env: plaid.environments.sandbox,
})


module.exports = plaidClient
When it comes to Plaid for my version of Node.js, and Plaid the legacy code worked instead of the new one. What is great is that Plaid documentation is clear and you can easily create correct endpoints.
First, we work with the link endpoint. Since this is a sandbox, we do not need much. For example, we will not use any of real webhooks and all of the data seem to be a bit hardcoded. There is only a placeholder in the code below.
// ./subscribers/plaidAuth/linkToken.js

const plaidClient = require('../../libs/PlaidClient')


const createLinkToken = async () => {
    const tokenResponse = await plaidClient.createLinkToken({
        user: {
            client_user_id: "1",
        },
        client_name: 'Plaid Test App',
        products: ["auth"],
        country_codes: ['US'],
        language: 'en',
        webhook: 'https://webhook.sample.com',
    })

    return tokenResponse
}


module.exports = createLinkToken
In the folder of the access tokens, as mentioned before, I have two functions - one to create, another one to delete access tokens.
// ./subscribers/plaidAuth/accessToken.js

const plaidClient = require('../../libs/PlaidClient')


const getAccessToken = async (publicToken) => {
    const response = await plaidClient.exchangePublicToken(publicToken)
    return response
}

const deleteCurrentAccessToken = async (accessToken) => {
    const response = await plaidClient.invalidateAccessToken(accessToken)
    return response
}


module.exports = { getAccessToken, deleteCurrentAccessToken }
When it comes to the services (which is the service layer/business logic here), invalidating access token in Plaid is just creating a new one. So what we want to do is to catch and not to pass a new access token.
// ./services/deleteAccessToken.js

const { deleteCurrentAccessToken } = require('../subscribers/plaidAuth/accessToken')


const deleteAccessToken = async (accessToken) => {
    const newAccessToken = await deleteCurrentAccessToken(accessToken)
    const { new_access_token, ...response } = newAccessToken
    return response
}


module.exports = deleteAccessToken
As you can see in Plaid docs, if you want to get the name of the institution to which you are logged into, first you need to get the item, where you can find and institution_id and then look up for the institution in the institution endpoint by its ID.
// ./subscribers/plaidEndpoints/item.js

const plaidClient = require('../../libs/PlaidClient')


const getAccessItem = async (accessToken) => {
    const item = await plaidClient.getItem(accessToken)
    return item
}


module.exports = getAccessItem
// ./subscribers/plaidEndpoints/institution.js

const plaidClient = require('../../libs/PlaidClient')


const getInstitutionById = async (institutionId) => {
    const institution = await plaidClient.getInstitutionById(institutionId, ['US', 'GB', 'ES', 'NL', 'FR', 'IE', 'CA'])
    return institution
}


module.exports = getInstitutionById
// ./services/getInstitution.js

const OperationalCustomError = require('../libs/errors/OperationalCustomError')

const getInstitutionById = require('../subscribers/plaidEndpoints/institution')
const getItem = require('./getItem')


const getInstitution = async (accessToken) => {
    const item = await getItem(accessToken)
    if (!item || !item.item || !item.item.institution_id) {
        throw new OperationalCustomError(404, 'InstitutionNotFound', 'ERR_NOT_FOUND', 'NOT_FOUND', 'Institution not found in the Plaid Item')
    }
    const institution = await getInstitutionById(item.item.institution_id)
    return institution
}


module.exports = getInstitution
Things are way simpler when it comes to accounts and balance. We just use endpoints from Plaid API. In the case of balance, we send the account id from the URL (req.query).
// ./subscribers/plaidEndpoints/accounts.js

const plaidClient = require('../../libs/PlaidClient')


const getItemAccounts = async (accessToken) => {
    const accounts = await plaidClient.getAccounts(accessToken)
    return accounts
}


module.exports = getItemAccounts
// ./subscribers/plaidEndpoints/balance.js

const plaidClient = require('../../libs/PlaidClient')


const getAccountBalance = async (accessToken, account_ids) => {
    const auth = await plaidClient.getBalance(accessToken, { account_ids: account_ids })
    return auth
}


module.exports = getAccountBalance
// ./services/getAccounts.js

const getItemAccounts = require('../subscribers/plaidEndpoints/accounts')


const getAccounts = async (accessToken) => {
    const accounts = await getItemAccounts(accessToken)
    return accounts
}


module.exports = getAccounts
// ./services/getBalance.js

const getAccountBalance = require('../subscribers/plaidEndpoints/balance')


const getBalance = async (accessToken, accountId) => {
    const auth = await getAccountBalance(accessToken, [accountId])
    return auth
}


module.exports = getBalance
When it comes to transactions, there is an additional factor which is the date format. We want to have the start and end date of the transactions in a query in the URL. I check the format using Moment.js library. It is still very commonly used but it became a legacy project. If you want to use something different, check the recommendations. The checks are done in a helper function verifyStartEndDateFormat.js.
// ./subscribers/plaidEndpoints/transactions.js

const plaidClient = require('../../libs/PlaidClient')


const getAccountTransactions = async (accessToken, startDate, endDate, accountId) => {
    const optionsTransaction = {
        account_ids: [accountId]
    }

    const transactions = await plaidClient.getTransactions(accessToken, startDate, endDate, optionsTransaction)

    return transactions
}


module.exports = getAccountTransactions
// ./services/getTransactions.js

const OperationalCustomError = require('../libs/errors/OperationalCustomError')
const verifyStartEndDateFormat = require('../libs/verifyStartEndDateFormat')

const getAccountTransactions = require('../subscribers/plaidEndpoints/transactions')


const getTransactions = async (accessToken, dates, accountId) => {
    const { startDate, endDate } = dates

    if (!startDate || !endDate) {
        throw new OperationalCustomError(400, 'MissingFieldError', 'ERR_MISSING_ARGS', 'INVALID_REQUEST', 'No transactions start or end date passed')
    }

    if (verifyStartEndDateFormat(startDate, endDate, 'YYYY-MM-DD')) {
        throw new OperationalCustomError(400, 'InvalidFormatError', 'ERR_INVALID_ARG_VALUE', 'INVALID_REQUEST', 'Wrong date format passed')
    }

    const transactions = await getAccountTransactions(accessToken, startDate, endDate, accountId)

    return transactions
}


module.exports = getTransactions
// ./libs/verifyStartEndDateFormat.js

const moment = require('moment')


const verifyStartEndDateFormat = (startDate, endDate, format) => {
    const isStartDateFormat = moment(startDate, format, true).isValid()
    const isEndDateFormat = moment(endDate, format, true).isValid()

    return (isStartDateFormat !== true || isEndDateFormat !== true)
}


module.exports = verifyStartEndDateFormat
The last thing to mention when it comes to the backend is the additional handling of authorization. In theory, auth could be checked with any request that requires an access token. If there is an authorization error, it says that there is not authorized. And this is what I was usually doing in React. I had an error and auth contexts that were handling authorization.
But here the solution will be slightly different. You will see more in the frontend section of the article. What I can tell you now is that we will be sending auth requests at the beginning of rendering pages to check whether the user is authorized or not. The handling of it in the frontend will be explained later.
When it comes to the backend and Plaid API, we need to keep in mind that Plaid API auth endpoint is not the best to check our auth. Plaid API auth endpoint verifies bank account information at the bank. Plaid even warns that Plaid API auth requests may take more time than the others (in practice, from my experience out of all the endpoints I used including the Plaid API auth endpoint, it is the Plaid API transaction endpoint that takes the longest time to perform). What we need in this particular app is just checking whether we are logged in. And, as you remember from the earlier part of the post, it is the Plaid API item endpoint that is responsible for the user's login to the specific bank.
// ./services/getAuth.js

const getItem = require('./getItem')


const getAuth = async (accessToken) => {
    const auth = await getItem(accessToken)
    const auth_response = {
        status_code: auth.status_code,
        request_id: auth.request_id,
        description: "Authorized"
    }
    return auth_response
}


module.exports = getAuth
Additionally, what I want to emphasize is that using the Plaid API item endpoint makes sense in this particular version of the app. If you would like to connect users to have several items (logins), save Plaid access tokens somewhere in the database, you need a separate authorization system that would give access to the database in which access tokens are stored. In other projects, I have used NextAuth.js and I think it is a reliable and robust solution.
14. Back to frontend
Just a quick refresher on how the Next.js app will look like. It is not necessary a frontend app because a part of it will be a server-side API. The pages will be rendered client-side. Client-side rendering is the optimal solution when it comes to the apps in which you need to login, have dashboards, multiple users accounts. The static site does not make any sense (it would be crazy to create static pages for every logged in user) while server-side rendering could be a bit too heavy solution, especially that for every request we will require an access token. Of course, we want our page to load fast and be light for the user but we also do not want to unnecessarily use our sever too much, potentially spending a fortune. In this app, we use servers pretty heavily anyway, taking into account that we have here two API servers.
15. Frontend folder structure
.
├── README.md
├── components
│   ├── DefaultLayout.js
│   ├── ErrorItem.js
│   ├── FullSiteCentered.js
│   ├── Navbar.js
│   ├── RouteProtection.js
│   ├── account
│   │   ├── BalanceBox.js
│   │   ├── BalanceBoxContent.js
│   │   ├── TransactionRecord.js
│   │   └── TransactionsTable.js
│   ├── accounts
│   │   ├── Account.js
│   │   └── Accounts.js
│   ├── loader
│   │   ├── Loader.js
│   │   └── LoaderSite.js
│   ├── login
│   │   ├── BankBox.js
│   │   ├── LinkPlaid.js
│   │   ├── LoginPage.js
│   │   └── LoginPlaid.js
│   └── navbar
│       ├── NavbarLogo.js
│       ├── NavbarMenuItem.js
│       └── NavbarMenuLogout.js
├── context
│   ├── AuthContext.js
│   └── AuthContextProvider.js
├── libs
│   ├── accessToken
│   │   ├── addAccessToken.js
│   │   └── destroyAccessToken.js
│   ├── apiErrorHandler.js
│   ├── generateErrorObject.js
│   ├── nestedObjectCheck.js
│   └── requests
│       ├── apiRequest.js
│       ├── backendRequest.js
│       ├── fetchRequest.js
│       ├── fetchRequestWithAuth.js
│       ├── fetchRequestWithDeleteToken.js
│       ├── fetchRequestWithSettingHttpOnlyCookie.js
│       └── swrRequest.js
├── middleware
│   ├── withApiErrorHandler.js
│   └── withHttpOnlyCookie.js
├── next.config.js
├── package-lock.json
├── package.json
├── pages
│   ├── _app.js
│   ├── accounts
│   │   └── [accountId].js
│   ├── accounts.js
│   ├── api
│   │   ├── accounts.js
│   │   ├── auth.js
│   │   ├── balance
│   │   │   └── [accountId].js
│   │   ├── hello.js
│   │   ├── institution.js
│   │   ├── link.js
│   │   ├── login.js
│   │   ├── logout.js
│   │   └── transactions
│   │       └── [accountId].js
│   └── index.js
├── public
│   ├── favicon.ico
│   ├── logo.png
│   └── vercel.svg
└── styles
    ├── FullSiteCentered.module.scss
    ├── Home.module.scss
    ├── Loader.module.scss
    └── globals.scss
16. Frontend auth strategy, AuthContext and RouteProtection
Our frontend auth strategy will be similar to the solution described here. We will not use any third-party library.
I will build auth context in which, we will send API requests to the endpoint checking auth. Then RouteProtection component will be wrapping all the other components in the app. If the user will be unauthorized, RouteProtection Higher Order Component will return the login page.
You can see that Next.js app component includes some imports of Font Awesome. It is one of the most popular fonts library. It is actually Bulma.io which uses Font Awesome.
// ./_app.js

import '../styles/globals.scss'

import { config } from '@fortawesome/fontawesome-svg-core'
import '@fortawesome/fontawesome-svg-core/styles.css'
config.autoAddCss = false

import AuthContextProvider from '../context/AuthContextProvider'
import RouteProtection from '../components/RouteProtection'


function MyApp({ Component, pageProps }) {
  return (
    <AuthContextProvider>
      <RouteProtection>
        <Component {...pageProps} />
      </RouteProtection>
    </AuthContextProvider>
  )
}


export default MyApp
// ./context/AuthContext.js

import { createContext } from 'react'


const AuthContext = createContext()


export default AuthContext
// ./context/AuthContextProvider.js

import { useEffect, useState } from 'react'

import apiRequest from '../libs/requests/apiRequest'

import AuthContext from './AuthContext'


const AuthContextProvider = ({ children }) => {
    const [auth, setAuth] = useState({ isAuthenticated: false, loadingAuthentication: true })

    const checkAuth = async () => {
        try {
            const dataAuth = await apiRequest('/api/auth')
            if (dataAuth && dataAuth.status_code >= 200 && dataAuth.status_code < 300) {
                setAuth({ isAuthenticated: true, loadingAuthentication: false })
            } else {
                setAuth({ isAuthenticated: false, loadingAuthentication: false })
            }
        } catch (err) {
            setAuth({ isAuthenticated: false, loadingAuthentication: false })
            console.error(err)
        }
    }

    useEffect(() => {
        checkAuth()
    }, [])

    return (
        <AuthContext.Provider value={ { checkAuth, ...auth } }>
            {children}
        </AuthContext.Provider>
    )
}


export default AuthContextProvider
17. Next.js server-side API strategy
As mentioned before Next.js app is a full-stack app with the client and server-side. On the server-side, we have an API server that is a bit like a proxy API server. However, it modifies the requests. For example, the access token is sent to the Express.js app through a bearer token while in the frontend it is sent using HTTP-only cookie.
There are several things that I need to mention when we speak about API on the server-side of the Next.js app.
First of all, I created a centralized function that is used in Next.js API routes. Most of the handlers look exactly the same, so using a universal function helps us with keeping a DRY principle. Apart from that, I find having all the API request functions in one place more organized than having everything all around the place.
In the main request function for the backend, we handle errors and wrong requests. Error and other objects/functions will be explained later.
// ./libs/requests/backendRequest.js

import fetchRequest from './fetchRequest'
import fetchRequestWithAuth from './fetchRequestWithAuth'
import fetchRequestWithSettingHttpOnlyCookie from './fetchRequestWithSettingHttpOnlyCookie'
import fetchRequestWithDeleteToken from './fetchRequestWithDeleteToken'

import generateErrorObject from '../generateErrorObject'
import nestedObjectCheck from '../nestedObjectCheck'


const backendRequest = async (req, res, address, method='GET') => {
    let response;

    const wrongMethodError = () => generateErrorObject(405, 'Method not allowed')

    if (address === 'http://localhost:8002') {
        if (method === 'GET') {
            response = await fetchRequest(address, {
                method: method
            })
        } else {
            throw wrongMethodError()
        }
    } else if (address === 'http://localhost:8002/access-token') {
        if (method === 'GET') {
            if (nestedObjectCheck(req, 'body.publicToken')) {
                response = await fetchRequestWithSettingHttpOnlyCookie(res, address, req.body.publicToken)
            } else {
                throw generateErrorObject(400, 'No public token included')
            }
        } else if (method === 'DELETE') {
            response = await fetchRequestWithDeleteToken(res, address, method, res.locals.bearerToken)
        } else {
            throw wrongMethodError()
        }
    } else if (
        address === 'http://localhost:8002/auth'
        || address === 'http://localhost:8002/institution'
        || address === 'http://localhost:8002/accounts'
        || address.startsWith('http://localhost:8002/balance')
        || address.startsWith('http://localhost:8002/transactions')
    ) {
        if (method === 'GET') {
            response = await fetchRequestWithAuth(address, method, res.locals.bearerToken)
        } else {
            throw wrongMethodError()
        }
    } else {
        throw generateErrorObject(404, 'No backend endpoint available')
    }

    if (!response.status_code || response.status_code >= 400) throw response

    res.status(response.status_code).json(response)
}


export default backendRequest
// ./libs/requests/fetchRequest.js

export default async function fetchRequest(address, config) {
    const response = await fetch(address, config)

    const status = response.status
    const data = await response.json()

    return {
        ...data,
        status_code: status
    }
}
// ./libs/requests/fetchRequestWithAuth.js

import fetchRequest from './fetchRequest'


export default async function fetchRequestWithAuth(address, method='GET', bearerToken) {
    const response = await fetchRequest(address, {
        method: method,
        headers: {
            'Authorization': bearerToken,
        },
    })

    return response
}
// ./libs/requests/fetchRequestWithSettingHttpOnlyCookie.js

import fetchRequest from './fetchRequest'
import addAccessToken from '../accessToken/addAccessToken'


export default async function fetchRequestWithSettingHttpOnlyCookie(res, address, publicToken) {
    const response = await fetchRequest(address, {
        method: 'POST',
        headers: {
            'Accept': 'application/json',
            'Content-Type': 'application/json',
        },
        body: JSON.stringify({ publicToken: publicToken })
    })

    addAccessToken(res, response.access_token)

    return response
}
// ./libs/requests/fetchRequestWithDeleteToken.js

import fetchRequestWithAuth from './fetchRequestWithAuth'
import destroyAccessToken from '../accessToken/destroyAccessToken'


export default async function fetchRequestWithDeleteToken(res, address, method='GET', bearerToken) {
    const response = await fetchRequestWithAuth(address, 'DELETE', bearerToken)

    destroyAccessToken(res)

    return response
}
There are separate functions for setting and deleting HTTP-only cookies. I use a package called nookies that makes working with HTTP-only cookies easy and is made specifically for Next.js.
// ./libs/accessToken/addAccessToken.js

import { setCookie } from 'nookies'


export default function addAccessToken(res, accessToken) {
    return setCookie( {res}, 'accesstoken', accessToken, { httpOnly: true })

}
// ./libs/accessToken/destroyAccessToken.js

import { destroyCookie } from 'nookies'


export default function destroyAccessToken(res) {
    return destroyCookie({ res }, 'accesstoken')
}
Another very important topic is middleware for Next.js API. I use it for handling errors, parsing tokens from the frontend using nookies and throwing errors when there are some issues with cookies.
In the app, I am using the 11.1.0 version of Next.js. A few days before writing this article, Next.js 12 was released. It consists of a beta version of Next.js middleware feature. It seems that it will make life much easier.
However, at this point we can create middleware using a wrapper functions. This article and this video explain it very well.
// ./middleware/withApiErrorHandler.js

import apiErrorHandler from "../libs/apiErrorHandler"


const withApiErrorHandler = (handler) => {
    return async (req,res) => {
        try {
            await handler(req, res)
        } catch (err) {
            if (!err.status_code) err.status_code = 500
            await apiErrorHandler(err, res)
        }


    }
}


export default withApiErrorHandler
// ./middleware/withHttpOnlyCookie.js

import { parseCookies } from 'nookies'


const withHttpOnlyCookie = (handler) => {
    return async (req,res) => {
        const cookies = parseCookies({req})

        if (!cookies.accesstoken) return res.status(401).json({
            status_code: 401,
            error_code: "NO_ACCESS_TOKEN"
        })

        res.locals = {
            ...res.locals,
            bearerToken: 'Bearer ' + cookies.accesstoken
        }

        return handler(req, res)
    }
}


export default withHttpOnlyCookie
API routes look like that. If you want to learn more how API routes (including dynamic routes) work in Next.js take a look at Next.js docs. You can see here how the middleware functions are wrapping the handlers. Pay attention to some of the handlers where withHttpOnlyCookie is not wrapping them. It is because we do not send access token there (link.js and login.js in which HTTP only cookie is set).
// ./pages/api/accounts.js

import withApiErrorHandler from '../../middleware/withApiErrorHandler'
import withHttpOnlyCookie from '../../middleware/withHttpOnlyCookie'

import backendRequest from '../../libs/requests/backendRequest'


const handler = async (req, res) => {
    await backendRequest(
        req,
        res,
        'http://localhost:8002/accounts'
    )
}


export default withApiErrorHandler(withHttpOnlyCookie(handler))
// ./pages/api/auth.js

import withApiErrorHandler from '../../middleware/withApiErrorHandler'
import withHttpOnlyCookie from '../../middleware/withHttpOnlyCookie'

import backendRequest from '../../libs/requests/backendRequest'


const handler = async (req, res) => {
    await backendRequest(
        req,
        res,
        'http://localhost:8002/auth'
    )
}


export default withApiErrorHandler(withHttpOnlyCookie(handler))
// ./pages/api/institution.js

import withApiErrorHandler from '../../middleware/withApiErrorHandler'
import withHttpOnlyCookie from '../../middleware/withHttpOnlyCookie'

import backendRequest from '../../libs/requests/backendRequest'


const handler = async (req, res) => {
    await backendRequest(
        req,
        res,
        'http://localhost:8002/institution'
    )
}


export default withApiErrorHandler(withHttpOnlyCookie(handler))
// ./pages/api/link.js

import withApiErrorHandler from '../../middleware/withApiErrorHandler'
import backendRequest from '../../libs/requests/backendRequest'


const handler = async (req, res) => {
    await backendRequest(
        req,
        res,
        'http://localhost:8002'
    )
}


export default withApiErrorHandler(handler)
// ./pages/api/login.js

import withApiErrorHandler from '../../middleware/withApiErrorHandler'
import backendRequest from '../../libs/requests/backendRequest'


const handler = async (req, res) => {
    await backendRequest(
        req,
        res,
        'http://localhost:8002/access-token'
    )
}


export default withApiErrorHandler(handler)
// ./pages/api/logout.js

import withApiErrorHandler from '../../middleware/withApiErrorHandler'
import withHttpOnlyCookie from '../../middleware/withHttpOnlyCookie'

import backendRequest from '../../libs/requests/backendRequest'


const handler = async (req, res) => {
    await backendRequest(
        req,
        res,
        'http://localhost:8002/access-token',
        'DELETE'
    )
}


export default withApiErrorHandler(withHttpOnlyCookie(handler))
// ./pages/api/balance/[accountId].js

import withApiErrorHandler from '../../../middleware/withApiErrorHandler'
import withHttpOnlyCookie from '../../../middleware/withHttpOnlyCookie'

import backendRequest from '../../../libs/requests/backendRequest'


const handler = async (req, res) => {
    const { accountId } = req.query

    await backendRequest(
        req,
        res,
        `http://localhost:8002/balance/${accountId}`
    )
}

export default withApiErrorHandler(withHttpOnlyCookie(handler))
// ./pages/api/transactions/[accountId].js

import withApiErrorHandler from '../../../middleware/withApiErrorHandler'
import withHttpOnlyCookie from '../../../middleware/withHttpOnlyCookie'

import backendRequest from '../../../libs/requests/backendRequest'


const handler = async (req, res) => {
    const { accountId } = req.query

    await backendRequest(
        req,
        res,
        `http://localhost:8002/transactions/${accountId}?startDate=2018-11-09&endDate=2021-09-07`
    )
}


export default withApiErrorHandler(withHttpOnlyCookie(handler))
18. Frontend client-side API strategy, SWR
On the client side, I will use a regular fetcher and the package SWR.
SWR stands for stale while revalidate and was developed by the same company which have built Next.js, Vercel. Stale data means that it is retrieved from cache. It is not the most recent version of data. Revalidation in this case means that the data is fetched again. So in other words, "stale while revalidate" means that the data is first retrieved from the cache and then the request is done to revalidate data (to confirm that it is the same or to update it).
What is nice about SWR is that you can customize the requests with a lot of options available. Additionally, it is developer friendly solution. In SWR docs, recommended way of using their package is by having a special useSWR hook.
I know that you can use SWR for practically (almost) any scenario. However, if they do not want cached data and I really need to retrieve data in real-time, I would prefer to use a traditional fetch request (or my favourite package when it comes to API requests Axios, but in this app we use fetch). If you decide for using SWR even in that case, you could try achieving what you want with the mutate function.
SWR is perfect for the accounts and user data giving the user a good UX.
As with the API server in the Next.js app, I went for one centralised API function, here we are going to have two centralized functions. The first one will be resembling backendRequest.js. The second one will be made for the SWR package. I will use the first one for the link, access token and auth endpoints. We do not want any stale data there. When it comes to the second function it will be all the rest but there will be no address list written as if statements.
// ./libs/requests/apiRequest.js

import fetchRequest from './fetchRequest'

import nestedObjectCheck from '../nestedObjectCheck'


const apiRequest = async (address, values) => {
    let response;

    if (address === '/api/auth') {
        response = await fetchRequest(address, {
            method: 'GET',
            credentials: 'include'
        })
    } else if (address === '/api/link') {
        response = await fetchRequest(address, {
            method: 'GET'
        })
    } else if (address === 'api/login') {
        if (nestedObjectCheck(values, 'publicToken')) {
            response = await fetchRequest(address, {
                method: 'POST',
                headers: {
                    'Accept': 'application/json',
                    'Content-Type': 'application/json',
                },
                body: JSON.stringify({ publicToken: values.publicToken })
            })
        } else {
            throw new Error('No public token')
        }
    } else if (address === '/api/logout') {
        response = await fetchRequest(address, {
            method: 'GET',
            credentials: 'include'
        })
    } else {
        throw new Error('Wrong method or URL')
    }

    return response
}


export default apiRequest
// ./libs/requests/swrRequest.js

import useSWR from 'swr'


export default function swrRequest(url) {
    const fetcher = (...args) => fetch(...args).then(async res => {
        const response = await res.json()
        if (!res.ok) {
            const error = new Error(`There was an error: ${response.status_code} ${response.message}`)
            error.status = response.status_code
            error.message = response.message
            error.code = response.code
            error.type = response.type
            throw error
        }
        return response
    }).catch(error => {
        throw error
    })

    const { data, error } = useSWR(url, fetcher)

    return {
        data: data,
        loading: !data && !error,
        error: error
    }
}
Thanks to that you insert either swrRequest or apiRequest with the URL as a parameter. You may ask why I did not combine both of the methods together in one function. Probably it would be somehow possible but keep in mind that useSwr (used in swrRequest) does not need await or then. That is why, if we simply use useSwr in asynchronous function, we will return Promise and not the value. Additionally, non-cached and cached requests could be differentiated with different functions. swrRequests requests will be always the same. It is really a matter of taste and personal preferences.
19. Error handling in Next.js app
Once again, let's divide errors into server and client-side.
In the server-side I will use a method inspired by this article. I have a function that creates an error object and assigns to it some extra properties. I do not create a child of an object like in the backend but a function that does it. Then there is a handler that is responsible for handling API errors by sending a response with a specific error code and message. This handler is used in the middleware shown above.
// ./libs/generateErrorObject.js

export default function generateErrorObject ({message, statusCode, name, code, type}) {
    let errorObject = new Error(message ? message : 'Something went wrong')
    errorObject.status_code = statusCode ? statusCode : 500
    errorObject.name = name ? name : 'UnknownError'
    errorObject.code = code ? code : 'ERR_UNKNOWN'
    errorObject.type = type ? type : 'UnknownError'
    return errorObject
}
// ./libs/apiErrorHandler.js

export default function apiErrorHandler(err, res) {
    console.error(err)
    return res.status(err.status_code).json(err)
}
When it comes to the frontend we handle errors on the user side.
SWR fetcher has its own error catching and returns an error that is different than undefined if the error occurs. Then we handle such an error by returning an ErrorItem component. This error item component will output the message to the user.
It is a simple solution. An alternative solution, which I have implemented in some other projects, could be an error context. An error context would return an error message as the alert component (kind of notification you can receive at the top of the website).
When it comes to non-SWR error handling it will be specific to the functionality of the error. For example, in the case of link creation, there would be a console error. In case of an error in getting an access token, the user will just not receive an access token and receive a console error. In case of an error in auth, the user will be logged out. Of course, in the case of link and access token endpoints part of the error handling is done by Plaid and their SDK.
You will see how it works fully when you see components code.
// ./components/ErrorItem.js

import { useRouter } from 'next/router'

import Loader from './loader/Loader'


const ErrorItem = ({ error }) => {
    const router = useRouter()
    const { status_code, code, message } = error

    code === 'NO_ACCESS_TOKEN' && router.reload()
    code === 'INVALID_ACCESS_TOKEN' && router.reload()

    if (code === 'PRODUCT_NOT_READY') return <Loader />

    console.error(`${status_code}: ${message}`)

    return (
        <div>
            {status_code}: {message}
        </div>
    )
}


export default ErrorItem
If the code of the error is NO_ACCESS_TOKEN or INVALID_ACCESS_TOKEN we want to reload the page. The reason for that is that we want to refresh the site if something is wrong with the access token to send an auth request and get the login page if the user is not authorized.
PRODUCT_NOT_READY is the error that we get from Plaid API. In this app, it sometimes occurs when we call transactions endpoints. After 5-10 seconds the data is already available. That is why the most optimal solution is the return the loader rather than an error text.
20. Nested chain key
I would like to introduce very briefly my helper nested chain key function.
Everyone who wrote apps in JavaScript/React knows the pain of the errors in nested objects. For example, if you have item1.item2.item3 and item2 does not exist in item1, you will receive an error. If the objects are one-level deep what you can do is to write item1 && item1.item2 and it looks nice. But you want to avoid a messy code like item1 && item1.item2 && item1.item2.item3.
What is cool, is that in the new ECMA2020Script there is optional chaining which you apply like that item1?.item2?.item3. Additionally, the issue is also solved in TypeScript in a similar way.
However, I do not use either TypeScript or ECMA2020 in this app.
There are some other solutions for that like one here but I find nested chain key function a cleaner solution.
We will use lodash and its _get method. It is super simple and I like to use it during the transitory period before optional chaining.
I created a separate function where I apply lodash _get method. Some developers could say it is unnecessary but I really prefer to organize and separate the files.
// ./libs/nestedObjectCheck.js

import _ from "lodash"


export default function nestedObjectCheck (originObject, path) {
    return _.get(originObject, path, false)
}
I recommend reading the discussion about the nested objects in JavaScript here.
20. Frontend code
The code is divided into pages and components. I tried to avoid passing props more than 1 level deep into components.
You have already seen some Bulma.io code and you will see it again in some other places. Using Bulma.io with Next.js is not that simple as it may seem. This is a good guide to how to do it successfully.
Below you can see the main page which is a small box with the name of the bank and the account page which consists of the list of accounts. Accounts page path could also be ./pages/accounts/index.js
// ./pages/index.js

import BankBox from '../components/login/BankBox'
import FullSiteCentered from '../components/FullSiteCentered'


function Home() {

    return (
        <FullSiteCentered>
            <BankBox />
        </FullSiteCentered>
    )

}


export default Home
// ./pages/accounts

import Accounts from '../components/accounts/Accounts'
import DefaultLayout from '../components/DefaultLayout'


const accounts = () => {

    return (
        <DefaultLayout>
            <Accounts />
        </DefaultLayout>
    )
}


export default accounts
There is also a dynamic page for a specific account.
// ./pages/accounts/[accountId].js

import BalanceBox from '../../components/account/BalanceBox'
import DefaultLayout from '../../components/DefaultLayout'
import TransactionsTable from '../../components/account/TransactionsTable'


const accountsId = () => {
    return (
        <DefaultLayout>
            <div className="level">
                <div className="level-item">
                    <BalanceBox />
                </div>
            </div>
            <div className="level">
                <div className="level-item">
                    <TransactionsTable />
                </div>
            </div>
        </DefaultLayout>
    )
}


export default accountsId
There are also also Login and Loaders pages that are not pages in Next.js terms but rather components returned when a user is not authorized.
// ./components/login/LoginPage.js

import FullSiteCentered from '../FullSiteCentered'
import LoginPlaid from './LoginPlaid'


const LoginPage = () => {
    return (
        <FullSiteCentered>
            <LoginPlaid />
        </FullSiteCentered>
    )
}


export default LoginPage
// ./components/loader/LoaderSite.js

import FullSiteCentered from '../FullSiteCentered'
import Loader from './Loader'


const LoaderSite = () => {
    return (
        <FullSiteCentered>
            <Loader />
        </FullSiteCentered>
    )
}


export default LoaderSite
In all cases of pages, there are two kinds of layouts - FullSiteCentered and DefaultLayout. They are wrapper components. Of course, they are not very advanced layouts because UI and UX were not my focus while building this web app.
// ./components/DefaultLayout.js

import Navbar from './Navbar'


const DefaultLayout = ({ children }) => {
    return (
        <>
            <Navbar />
            <div className="section">
                {children}
            </div>
        </>
    )
}


export default DefaultLayout
// ./components/FullSiteCentered.js

const FullSiteCentered = ({ children }) => {
    return (
        <div className="hero is-fullheight">
            <div className="tile is-align-items-center is-justify-content-center is-flex">
                {children}
            </div>
        </div>
    )
}


export default FullSiteCentered
// ./styles/FullSiteCentered.module.scss

.fullSiteCentered {
  position: absolute;
  top: 0;
  left: 0;
}
In the DefaultLayout it is the Navbar which is on the top.
import { useState } from 'react'

import NavbarLogo from './navbar/NavbarLogo'
import NavbarMenuItem from './navbar/NavbarMenuItem'
import NavbarMenuLogout from './navbar/NavbarMenuLogout'


const Navbar = () => {
    const [burgerActive, setBurger] = useState(false)

    const burgerToggle = () => {
        burgerActive ? setBurger(false) : setBurger(true)
    }

    const isActiveClass = burgerActive ? "is-active" : ""
    const navbarBurgerClasses = `navbar-burger ${isActiveClass}`
    const navbarMenuClasses = `navbar-menu ${isActiveClass}`


    return (
        <nav className="navbar" role="navigation" aria-label="main navigation">
            <div className="navbar-brand">
                <NavbarLogo />
                <a onClick={burgerToggle} role="button" className={navbarBurgerClasses} aria-label="menu" aria-expanded="false" data-target="navbarBasicExample">
                    <span aria-hidden="true">{burgerActive}</span>
                    <span aria-hidden="true"></span>
                    <span aria-hidden="true"></span>
                </a>
            </div>
            <div id="navbarBasicExample" className={navbarMenuClasses}>
                <div className="navbar-start">
                    <NavbarMenuItem
                        url="/"
                        name="Home"
                    />
                    <NavbarMenuItem
                        url="/accounts"
                        name="Accounts"
                    />
                    <NavbarMenuLogout />
                </div>
            </div>
        </nav>
    )
}


export default Navbar
In order to use Bulma.io, we need to import it to our globals.scss.
// ./styles/globals.scss

@import "~bulma/bulma";

html,
body {
  padding: 0;
  margin: 0;
  font-family: -apple-system, BlinkMacSystemFont, Segoe UI, Roboto, Oxygen,
    Ubuntu, Cantarell, Fira Sans, Droid Sans, Helvetica Neue, sans-serif;
}

a {
  color: inherit;
  text-decoration: none;
}

* {
  box-sizing: border-box;
}
Before I move to the navbar, login and other components I want to show you the code of RouteProtection I mentioned before when showing the context code. You can see here how context variables are used.
// ./components/RouteProtection.js

import { useContext } from 'react'

import AuthContext from '../context/AuthContext'

import LoaderSite from './loader/LoaderSite'
import LoginPage from './login/LoginPage'


const RouteProtection = ({children}) => {
    const authContext = useContext(AuthContext)
    const { isAuthenticated, loadingAuthentication } = authContext

    if (loadingAuthentication) return <LoaderSite />
    if (isAuthenticated !== true) return <LoginPage />

    return children
}


export default RouteProtection
Here it is Navbar with its components. Pay attention to the NavbarMenuLogout.js in which I call the endpoint responsible for logout and the context function which sends the request to auth endpoint. That will open the login page. With only router.push RouteProtection context will not be changed. You would need to use router.reload which would refresh the entire site if you want to stay with routers. More about router methods here. Otherwise, the thing is to re-render RouteProtection when logging out. And to do that the context value must change. Here is more about it from React docs and here you can read a great discussion about it.
When it comes to logo Navbar, I generated it from one of the sites for business name and logo generator (sorry, I forgot the name of both "my business" and the service which generated it; you can find these on Google). We keep static files like the image in public folder. In production, it would be better to use services like AWS S3 bucket or Cloudinary. More about Next.js static files.
// ./components/navbar/NavbarLogo.js

import Image from 'next/image'
import Link from 'next/link'

const NavbarLogo = () => {
    return (
        <Link href='/'>
            <a className="navbar-item" href="https://bulma.io">
                <Image src="/logo.png" width="60" height="60" />
            </a>
        </Link>
    )
}

export default NavbarLogo
// ./components/navbar/NavbarMenuItem.js

import Link from 'next/link'


const NavbarMenuItem = ({ url, name }) => {
    return (
        <Link href={url}>
            <a className="navbar-item">
                {name}
            </a>
        </Link>
    )
}


export default NavbarMenuItem
// ./components/navbar/NavbarMenuLogout.js

import { useContext } from 'react'

import { useRouter } from 'next/router'

import apiRequest from '../../libs/requests/apiRequest'

import AuthContext from '../../context/AuthContext'


const NavbarMenuLogout = () => {
    const router = useRouter()
    const authContext = useContext(AuthContext)
    const { checkAuth } = authContext

    const clickLogout = async (e) => {
        await apiRequest('/api/logout')
        await checkAuth()
        router.push('/')
    }

    return (
        <a className="navbar-item" onClick={(e) => clickLogout(e)}>
            Logout
        </a>
    )
}


export default NavbarMenuLogout
The login page is the combination of the link solution for React proposed by Plaid and some custom react code. Everything starts in the LoginPage, whose code you can find above, goes through LoginPlaid to LinkToken.
// ./components/login/LoginPlaid.js

import { useEffect, useState } from 'react'

import Error from 'next/error'

import apiRequest from '../../libs/requests/apiRequest'
import nestedObjectCheck from '../../libs/nestedObjectCheck'

import LinkPlaid from './LinkPlaid'
import Loader from '../loader/Loader'


function LoginPlaid() {
    const [linkToken, setLinkToken] = useState(null)
    const [isLinkTokenLoading, setLinkTokenLoading] = useState(true)
    const [error, setError] = useState(null)

    const generateToken = async () => {
        try {
            setLinkTokenLoading(true)
            const linkTokenData = await apiRequest('/api/link')
            if (
                linkTokenData.status_code >= 200
                && linkTokenData.status_code < 300
                && linkTokenData.link_token
            ) {
                setLinkToken(linkTokenData.link_token)
                setError(null)
            } else {
                setLinkToken(null)
                setError(linkTokenData)
            }
            setLinkTokenLoading(false)
        } catch (error) {
            setLinkToken(null)
            setError(error)
            setLinkTokenLoading(false)
            console.error(error)
        }
    }

    useEffect(() => {
        if (linkToken === null) {
            generateToken()
        }
    }, [])

    if (isLinkTokenLoading === true) return <Loader/>

    if (error || !linkToken) return <Error statusCode={nestedObjectCheck(error, 'status_code') ? error.status_code : 500} />

    return (
        <LinkPlaid linkToken={linkToken} />
    )
}


export default LoginPlaid
// ./components/login/LinkPlaid.js

import { useCallback, useContext } from 'react'

import { usePlaidLink } from 'react-plaid-link'

import AuthContext from '../../context/AuthContext'

import apiRequest from '../../libs/requests/apiRequest'


const LinkPlaid = ({ linkToken }) => {
    const authContext = useContext(AuthContext)
    const { checkAuth } = authContext

    const onSuccess = useCallback( async (publicToken, metadata) => {
        try {
            const response = await apiRequest('api/login', { publicToken: publicToken })
            checkAuth()
        } catch (err) {
            console.error(err)
        }
    }, [])

    const config = {
        token: linkToken,
        onSuccess
    }

    const { open, ready } = usePlaidLink(config)

    return (
        <button className="button is-link" onClick={() => open()} disabled={!ready}>
            Link account
        </button>
    )
}


export default LinkPlaid
When logged in we would receive a BankBox component. You can see here how swrRequests were used. We destructure three constant variables the data, loading and error.
// ./components/login/BankBox.js

import Link from 'next/link'

import nestedObjectCheck from '../../libs/nestedObjectCheck'
import swrRequest from '../../libs/requests/swrRequest'

import ErrorItem from '../ErrorItem'
import Loader from '../loader/Loader'

import { FontAwesomeIcon } from '@fortawesome/react-fontawesome'

import { faAngleRight } from '@fortawesome/free-solid-svg-icons'


const BankBox = () => {
    const { data: dataInstitution, error: errorInstitution, loading: loadingInstitution } = swrRequest('/api/institution')

    if (errorInstitution) return <ErrorItem error={errorInstitution} />
    if (loadingInstitution) return <Loader />

    return (
        <Link href='/accounts' passHref>
            <div className="card">
                <header className="card-header">
                    <p className="card-header-title">
                        {nestedObjectCheck(dataInstitution, 'institution.name') && dataInstitution.institution.name}
                    </p>
                    <button className="card-header-icon">
                        <span className="icon">
                            <FontAwesomeIcon icon={faAngleRight} />
                        </span>
                    </button>
                </header>
            </div>
        </Link>
    )
}


export default BankBox
You can see the Loader component in many places. I used the code from here and translated it (it is CSS code) into Sass.
import styles from '../../styles/Loader.module.scss'


const Loader = () => {
    return (
        <div className={styles.loader}></div>
    )
}


export default Loader
// ./styles/Loader.module.scss

@mixin animate($animation, $duration, $method, $times) {
  animation: $animation $duration $method $times;
}

@mixin keyframes($name) {
  @keyframes #{$name} {
    @content;
  }
}

.loader {
  display: inline-block;
  width: 80px;
  height: 80px;
}
.loader:after {
  content: " ";
  display: block;
  width: 64px;
  height: 64px;
  margin: 8px;
  border-radius: 50%;
  border: 6px solid #d3d3d3;
  border-color: #d3d3d3 transparent #d3d3d3 transparent;
  @include keyframes(loader) {
    0% {
      transform: rotate(0deg);
    }
    100% {
      transform: rotate(360deg);
    }
  }
  @include animate(loader, 1.2s, linear, infinite);
}
When it comes to the accounts page we have a list of accounts that are represented with an Account component.
// ./components/accounts/accounts.js

import nestedObjectCheck from '../../libs/nestedObjectCheck'
import swrRequest from '../../libs/requests/swrRequest'

import Account from './Account'
import ErrorItem from '../ErrorItem'
import LoaderSite from '../loader/LoaderSite'


const Accounts = () => {
    const { data: dataAccounts, error: errorAccounts, loading: loadingAccounts } = swrRequest('/api/accounts')

    if (errorAccounts) return <ErrorItem error={errorAccounts} />
    if (loadingAccounts) return <LoaderSite />

    return (
        <div className="columns is-multiline is-variable">
                {nestedObjectCheck(dataAccounts, 'accounts') && dataAccounts.accounts.map(account =>
                    <Account
                        key={account.account_id}
                        id={account.account_id}
                        name={account.name}
                        official_name={account.official_name}
                        type={account.type}
                        subtype={account.subtype}
                        available_balance={nestedObjectCheck(account, 'balances.available') ? account.balances.available : null}
                        current_balance={nestedObjectCheck(account, 'balances.current') ? account.balances.current : null}
                        currency={nestedObjectCheck(account, 'balances.iso_currency_code') ? account.balances.iso_currency_code : null}
                        limit={nestedObjectCheck(account, 'balances.limit') ? account.balances.limit : null}
                    />
                )}
        </div>
    )
}


export default Accounts
// ./components/accounts/account.js

import Link from 'next/link'


const Account = ({ name, id, official_name, type, subtype, available_balance, current_balance, currency, limit }) => {
    const accountLink = "/accounts/" + id

    return (
        <div className="column is-one-third">
            <Link href={accountLink}>
                <a className="box">
                    <div className="heading" style={{ height: '3.5em' }}>
                        {official_name ? official_name : name}
                    </div>
                    <div className="title is-4">
                        {name}
                    </div>
                    <div className="title is-1">
                    {current_balance} {currency}
                    </div>
                    <div className="subtitle is-6" style={{ height: '3em' }}>
                        {available_balance ? `Available: ${available_balance} ${currency}` : `${'\u00A0'}`}
                    </div>
                    <div>{limit ? `Limit: ${limit}` : `${'\u00A0'}`}</div>
                    <div className="has-text-grey-lighter">#{type} #{subtype}</div>
                </a>
            </Link>
        </div>
    )
}


export default Account
When we go to the account page we receive the balance box and transaction table. The code is below.
// ./components/account/BalanceBox.js

import { useRouter } from 'next/router'

import nestedObjectCheck from '../../libs/nestedObjectCheck'
import swrRequest from '../../libs/requests/swrRequest'

import BalanceBoxContent from './BalanceBoxContent'
import ErrorItem from '../ErrorItem'
import Loader from '../loader/Loader'


const BalanceBox = () => {
    const router = useRouter()
    const { accountId } = router.query

    const { data: dataBalance, error: errorBalance, loading: loadingBalance } = swrRequest(`/api/balance/${accountId}`)

    if (errorBalance) return <ErrorItem error={errorBalance} />
    if (loadingBalance) return <Loader />

    return (
        <div className="box">
            { nestedObjectCheck(dataBalance, 'accounts[0].balances') && <BalanceBoxContent balanceAccounts={dataBalance.accounts[0]} />}
        </div>
    )
}


export default BalanceBox
// ./components/account/BalanceBoxContent.js

const BalanceBoxContent = ({ balanceAccounts }) => {
    const { balances, name, official_name, subtype, type } = balanceAccounts

    const currentValue = ({ current, iso_currency_code }) => current.toString() + " " + iso_currency_code.toString()

    return (
        <div className="tile is-ancestor">
            <div className="tile is-parent">
                <div className="tile is-child is-align-items-center is-justify-content-center is-flex">
                    <p className="title is-1 has-text-centered">{currentValue(balances)}</p>
                </div>
            </div>
            <div className="tile is-vertical is-parent">
                <div className="tile is-child">
                    <p className="title">{name}</p>
                </div>
                <div className="tile is-child">
                    <p className="subtitle">{official_name}</p>
                </div>
                <div className="tile is-child">
                    <div className="has-text-grey-lighter">#{type} #{subtype}</div>
                </div>
            </div>
        </div>
    )
}


export default BalanceBoxContent
// ./components/account/TransactionsTable.js

import { useRouter } from 'next/router'

import nestedObjectCheck from '../../libs/nestedObjectCheck'
import swrRequest from '../../libs/requests/swrRequest'

import Loader from '../loader/Loader'
import ErrorItem from '../ErrorItem'
import TransactionRecord from './TransactionRecord'


const TransactionsTable = () => {
    const router = useRouter()
    const { accountId } = router.query

    const { data: dataTransactions, error: errorTransactions, loading: loadingTransactions } = swrRequest(`/api/transactions/${accountId}`)

    if (loadingTransactions) return <Loader />
    if (errorTransactions) return <ErrorItem error={errorTransactions} />

    return (
        <table className="table">
            <thead>
                <tr>
                    <th>Date</th>
                    <th>Amount</th>
                    <th>Name</th>
                    <th>Categories</th>
                    <th>Transaction ID</th>
                    <th>Type</th>
                </tr>
            </thead>
            <tbody>
                {nestedObjectCheck(dataTransactions, 'transactions[0]') && dataTransactions.transactions.map(transaction => <TransactionRecord
                    key={transaction.transaction_id}
                    date={transaction.date}
                    amount={transaction.amount}
                    currency={transaction.iso_currency_code}
                    name={transaction.name}
                    categories={transaction.category}
                    transactionId={transaction.transaction_id}
                    type={transaction.transaction_type}
                />)}
            </tbody>
        </table>
    )
}


export default TransactionsTable
// ./components/account/TransactionRecord.js

const TransactionRecord = ({date, amount, currency, name, categories, transactionId, type}) => {
    return (
        <tr>
            <td>{date ? date : 'N/A'}</td>
            <td>{amount ? amount : 'N/A'} {currency ? currency : 'N/A'}</td>
            <td>{name ? name : 'N/A'}</td>
            <td>{categories ? categories.join(', ') : 'N/A'}</td>
            <th>{transactionId ? transactionId : 'N/A'}</th>
            <td>{type ? type : 'N/A'}</td>
        </tr>
    )
}


export default TransactionRecord
22. Summary
I hope you enjoyed this long post and found it useful.
Of course, this is not a complete product but something great as a core of the web full-stack app which can be an interesting product in the market.
Please, feel free to get in touch with me.